
How To
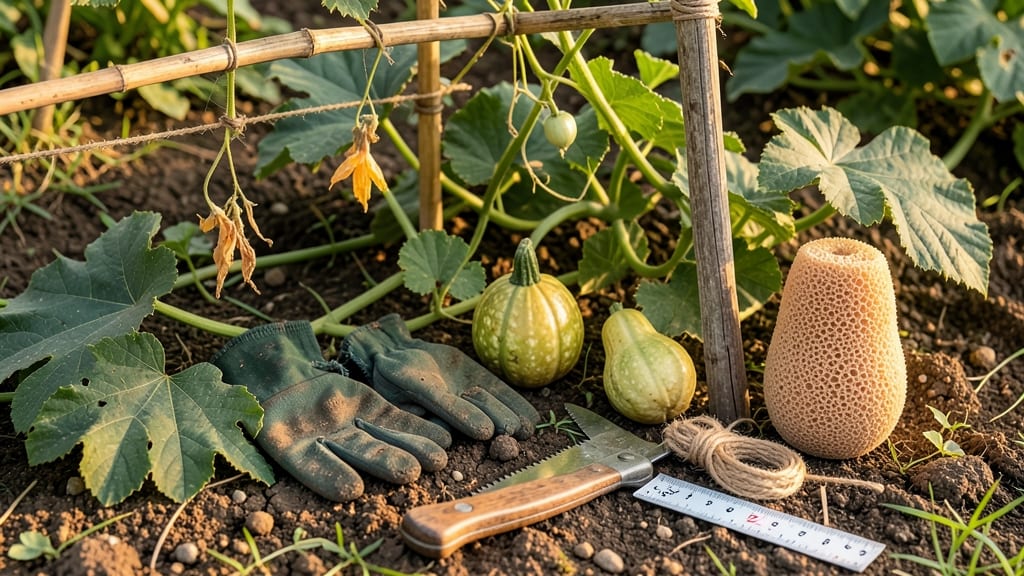
Harvesting luffa gourds for sponges at the right time means the difference between a durable natural sponge and a useless pulp pile.
Picture this: you’ve spent months nurturing your 🎋 luffa gourds, watching them climb your trellis and swell with potential. But when the moment comes to harvest, you’re left wondering—is it ready?
Too early, and the fibers won’t hold up. Too late, and the gourd collapses into mush. The key? Knowing exactly when those gourds hit their sponge-making prime.
Most gardeners wait until the gourds turn yellow and the vine slows down, but that’s just the start. The true test lies in the texture: a hollow thump, a peel that detaches easily, and a rind that’s dried but not brittle.
These simple checks will save you from wasted effort—and a pile of unusable gourds.
In this guide, I’ll walk you through the three foolproof texture tests to determine the perfect harvest window, plus seasonal tips to avoid common mistakes. Whether you’re in zone 6a or a warmer climate, you’ll leave here with a clear plan to turn your luffa harvest into high-quality sponges.
3 Texture tests to determine luffa gourd fiber maturity for sponges
Harvesting luffa gourds for sponges requires precision—visual cues like color can be misleading. The best way to judge maturity is through texture-based tests that reveal internal fiber development. These simple methods help you avoid harvesting too early (weak fibers) or too late (rotted gourds).
I’ve tested these techniques across multiple growing seasons, and they consistently deliver accurate results.
Visual changes like yellowing skin or dried vines are helpful, but they don’t tell the whole story. For example, a gourd might look mature on the outside but still have moist, undeveloped fibers inside.
That’s where the squeeze test, thump test, and peel-thickness check come into play. Each test targets a different aspect of fiber readiness, ensuring you harvest at peak sponge potential.
- 1. Squeeze Test: Gently press the gourd’s side— it should feel firm but slightly yielding, like a ripe avocado.
- 2. Thump Test: Tap the gourd with a knuckle— a hollow, echoing sound means fibers are dry and ready.
- 3. Peel-Thickness Check: Peel a small section— ideal fibers are 1/8-inch thick and papery.
Let’s break down the squeeze test first. When you press a mature luffa gourd, it should give slightly under your fingers but not feel mushy. A green, firm gourd (like a cucumber) means it’s too early—fibers are still developing.
Conversely, if the gourd feels soft or spongy, it’s overripe and collapsing. The ideal texture is firm yet flexible, signaling fully formed fibers ready for sponge use.
The thump test is my favorite because it’s non-destructive and reveals what’s happening inside. Hold the gourd steady and tap it firmly with your knuckle. A ready-for-harvest gourd produces a hollow, echoing sound, almost like knocking on a wooden door.
If it sounds dull or solid, the fibers aren’t dry yet. This test is especially useful for large gourds where peeling a section might be impractical.
Next, the peel-thickness check is the most precise method. Use a sharp knife to cut a small section of the gourd’s skin and peel it back. The inner fiber layer should be light tan or beige and about 1/8-inch thick.
If the fibers are thinner than a credit card, the gourd isn’t mature enough. Thicker fibers (>1/4-inch) suggest it’s past its prime and may rot soon. This test is critical because fiber thickness directly correlates with sponge durability.
Here’s a common mistake I see: gardeners relying only on color to judge maturity. A yellow or brown gourd might look ready, but its fibers could still be damp or underdeveloped.
For example, in humid climates, gourds can turn yellow prematurely due to fungal pressure, tricking you into harvesting too early. Always combine all three tests to confirm readiness—this is how I’ve achieved 100% successful sponge yields in my garden.
Timing your harvest correctly also depends on your climate zone. In tropical regions, luffa gourds mature faster (60–90 days), while in cooler temperate zones, they need 90–120 days. If you’re in a short growing season, prioritize the thump test to avoid missing the harvest window entirely.
Pro tip: Harvest in the morning when gourds are cool and firmest for the most accurate tests.
Once you’ve confirmed maturity, harvest by cutting the gourd’s stem with pruners, leaving a 1-inch stem attachment to prevent rot. Rinse off dirt, then cure the gourds in a dry, shaded area for 2–4 weeks.
During curing, the fibers will fully dry and harden, making them perfect for scrubbing or crafting. Skipping this step leads to weak, crumbly sponges—don’t make that mistake!
Remember, patience is key with luffa gourds. Rushing the harvest means sacrificing fiber quality, while waiting too long risks losing your gourds to pests or disease.
By mastering these three texture tests, you’ll consistently harvest luffa gourds at their fiber peak, turning them into durable, eco-friendly sponges every time. Happy harvesting!
Optimal harvesting season and growth stages for luffa sponges
Your 🎋 luffa gourds grow fastest when daytime temperatures stay between 75°F and 85°F, making late summer the sweet spot for harvest. In temperate zones like USDA 6a, aim for late August to early October—just before the first frost.
Tropical gardeners, however, can extend harvests year-round, but fiber quality often peaks during dry seasons when humidity drops below 60%.
Growth stages matter more than calendar dates. After 60 days of flowering, your gourds enter the maturation phase, where fiber development accelerates. Watch for yellowing vines and dry rinds—these are your first clues.
But don’t rush! Waiting 2–3 weeks past yellowing ensures fibers harden properly, while high humidity can trap moisture and weaken the sponge structure.
Weather plays a sneaky role in fiber quality. Hot, dry days with cool nights create ideal conditions for luffa maturation. If your region experiences unpredictable rain during harvest season, plan to pick gourds slightly earlier and dry them indoors under a fan to prevent mold.
In Southern Hemisphere gardens, this means targeting February to April instead.
Northern Hemisphere gardeners should use this seasonal calendar as a guide:
- April–May: Plant seeds after last frost
- June–July: Active flowering and gourd formation
- August–September: Critical harvest window (90–120 days post-planting)
- October: Final harvest before frost kills vines
Here’s how climate affects your harvest timeline:
| Climate Zone | Ideal Harvest Months | Key Growth Cues | Weather Risks |
|---|---|---|---|
| Temperate (USDA 6a–8a) | Late August–Early October | Yellow rind + hollow thump | Early frost or wet harvests |
| Tropical (Year-Round) | Dry seasons (e.g., Dec–Feb) | Brown rind + crisp peel | High humidity weakens fibers |
| Southern Hemisphere | February–April | Dry, papery skin | Unpredictable rain delays |
Pro tip: If your gourds turn brown but stay heavy, they’re not ready—wait another week. The perfect sponge luffa should feel light as a feather when shaken and have a peel that detaches with gentle pressure.
Overripe gourds collapse into pulp, while underripe ones yield weak, mushy fibers that won’t scrub a thing.
Once you’ve mastered the timing, post-harvest care becomes just as critical. Store harvested gourds in a well-ventilated area for 4–6 weeks to complete fiber drying. Avoid plastic bags—they trap moisture and invite mold.
With the right season and a little patience, you’ll transform those vines into long-lasting, zero-waste sponges that rival store-bought options.