
Vegetables
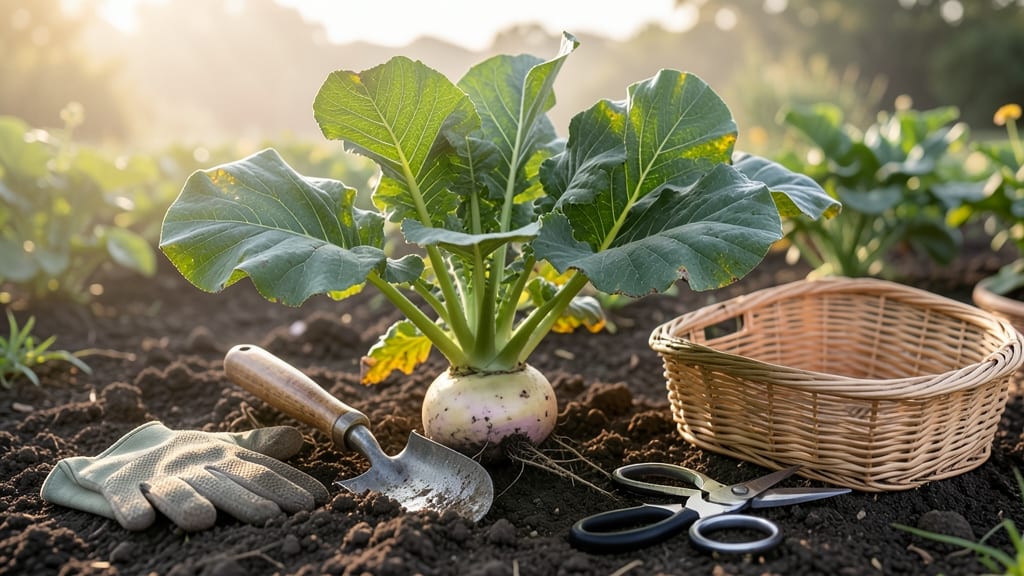
Harvesting turnips at the right time turns your garden into a flavor factory—when those roots hit golf ball size, you’ve got the sweetest, crispest taste possible.
But timing is everything: pull them too early, and you’re left with tiny, bitter nubs. Wait too long, and the roots turn woody or split. The difference between a disappointing bite and a garden-fresh triumph often comes down to knowing exactly when to yank them from the soil.
In Zone 6a, spring turnips are ready by June–July, while fall varieties peak in October–November. Look for firm, smooth roots about 2–3 inches wide, with dark green leaves still standing tall—those are your cues to grab a fork and dig in.
Below, I’ll walk you through how to spot the perfect turnip, harvest without bruising, and store them so they stay fresh for weeks. No more guessing—just peak-season flavor every time.

When to harvest turnips for maximum flavor and texture
Timing your turnip harvest is like catching a wave—too early and you’ll miss the sweetness, too late and you’ll get tough, woody roots. The ideal harvest window for turnips is when their roots reach about 2–3 inches in diameter, roughly the size of a golf ball.
This ensures they’re packed with flavor and tender enough to eat raw or cook. But don’t rely solely on size; pay attention to other visual and tactile cues that signal peak maturity.
Turnips are cool-season crops, meaning they thrive in spring and fall when temperatures hover between 45°F and 75°F. In warmer climates, they may mature faster, while cooler regions might need an extra week or two.
For example, in USDA Zone 6a, spring turnips are typically ready by late May to early June, while fall varieties should be harvested by mid-October before the first frost. Understanding your local climate helps you adjust your harvest timeline accordingly.
Here’s a quick reference to help you spot the perfect turnip for harvest:
| Sign | What to Look For | Action |
|---|---|---|
| Root Size | 2–3 inches in diameter (golf ball size) | Harvest now for peak flavor |
| Leaf Color | Dark green, vibrant foliage (6–8 inches tall) | Ideal time to pull roots |
| Root Texture | Firm, smooth skin (not soft or woody) | Ready for harvest |
| Ease of Pull | Roots slip easily from soil with gentle tug | Perfect harvest readiness |
| Warning: If leaves start yellowing or roots feel spongy, harvest immediately—this signals overmaturity. | ||
One of the most overlooked signs of turnip maturity is the condition of the leaves. Healthy turnip greens should be dark green and fully grown, typically reaching 6–8 inches in height.
If the leaves begin to yellow or bolt (send up a flower stalk), it’s a clear signal that the turnips are past their prime. This often happens when temperatures rise above 75°F, causing the plant to shift its energy from root development to seed production.
In cooler climates, this might not be an issue, but in hotter regions, consider harvesting turnips earlier in the season to avoid this problem.
Climate plays a huge role in turnip maturity. In cooler, northern regions, turnips may take 50–70 days to reach harvest size, while in warmer, southern climates, they might mature in as few as 30–40 days.
For example, if you’re growing turnips in Zone 8 or higher, you might need to plant them in early spring or late summer to avoid the heat stress that can make roots tough and bitter.
Always check your local frost dates and adjust your planting schedule to ensure you’re harvesting at the right time.
Another key indicator of turnip readiness is the skin texture. At peak harvest time, the skin should feel firm and smooth, almost like a small potato. If the skin feels soft or spongy, the turnip is overripe and likely to be pithy or hollow inside.
This is a common mistake gardeners make—waiting too long to harvest because they think bigger is better. In reality, larger turnips often lose their sweetness and tenderness, making them less enjoyable to eat. Aim for that golf ball size for the best balance of flavor and texture.
Don’t forget that turnip greens are edible too! While the roots are the star of the show, the leaves are packed with nutrients like vitamin C and calcium.
If you’re harvesting for both roots and greens, you can pull the entire plant when the roots reach 1–2 inches in diameter—this is perfect for baby turnips and tender greens. Just be sure to replant succession crops every 2–3 weeks to keep a steady harvest throughout the season.
This method works especially well in container gardens or small spaces where you want to maximize yield.
If you’re unsure whether your turnips are ready, perform the "gentle tug test". Gently pull on a turnip—if it comes out of the soil with minimal resistance, it’s ready to harvest. If it feels stubborn or the soil clings to the root, wait a few more days.
This simple test helps you avoid damaging the plant or harvesting too early. For larger turnips, you might need a garden fork to loosen the soil gently, but always handle the roots with care to prevent bruising, which can shorten their shelf life.
Once you’ve mastered the art of harvesting turnips at the right time, you’ll never settle for store-bought again. The key is to stay vigilant, check your plants regularly, and trust your senses—size, color, texture, and ease of pull are your best guides.
With practice, you’ll develop an eye for the perfect turnip, and your garden will thank you with a bounty of sweet, tender roots all season long. Happy harvesting! 🥕
Step-by-step turnip harvesting techniques to avoid damage
Harvesting turnips at the right time is just the first step—pulling them properly prevents bruising and preserves that garden-fresh sweetness. I’ve learned the hard way that rough handling turns crisp roots into mushy disappointment.
The key lies in gentle extraction, sharp tools, and knowing when to stop digging. Even the most patient turnip won’t forgive careless harvesting, so let’s break this down into foolproof steps.
Start by checking for firm, golf-ball-sized roots with smooth skin—this is your cue to act. Overripe turnips develop woody textures and bitter flavors, while underripe ones lack the satisfying crunch.
Work during cool morning hours when soil is moist but not soggy, making extraction easier. Avoid harvesting after rain, as wet soil clings to roots and invites rot during storage.
How to Harvest Turnips Without Damage
- 1 Loosen the soil around the turnip base with a garden fork or your fingers. Insert the tool 2 inches away from the root to avoid piercing it.
- 2 Grip the greens firmly and pull upward with steady pressure. If resistance meets you, wiggle gently—never yank or you’ll snap the root.
- 3 Shake off excess soil but avoid rubbing—this prevents skin abrasions. Use a soft brush if needed for stubborn dirt.
- 4 Trim the greens to 1 inch above the root using clean shears. Long stems draw moisture and shorten storage life.
- 5 Inspect for damage immediately. Discard any bruised or cracked roots—they’ll spoil within days.
Pro Tip: Harvest turnips on a dry, cloudy day to prevent sunburn on freshly exposed roots.
Using a garden fork is ideal for heavy, clay soils where roots resist pulling. For loose, sandy soil, your hands work just fine—just avoid digging too deep, which can damage nearby roots still growing.
I’ve found that sharp pruners (not kitchen scissors!) make quick work of trimming greens without tearing the root collar. Store harvested turnips in a cool, dark place (50–55°F) with high humidity to maintain crispness for up to 2 weeks.
One common mistake I see is harvesting when the soil is frozen—turnips become brittle and shatter easily. Another is leaving roots in the ground too long, which turns their sweetness bitter.
If you’re unsure whether your turnips are ready, check the leaf size: healthy greens should be 6–8 inches tall, not wilted or yellowing. This visual cue often predicts root readiness more accurately than guessing by size alone.
After harvesting, cure your turnips for 24 hours in a shaded area before storing. This drying period reduces moisture loss and prevents rot. Place them in a perforated plastic bag with a damp paper towel to maintain humidity, and check weekly for spoilage.
With these techniques, you’ll enjoy turnips at their peak—crisp, sweet, and free from garden mishaps.
Remember, the sooner you harvest after reaching maturity**, the better the flavor. Don’t wait until the leaves bolt or the roots split—these are clear signs you’ve missed the window. Now grab your fork, head to the garden, and enjoy the fruits of your labor—literally! 🥕✂️