
How To
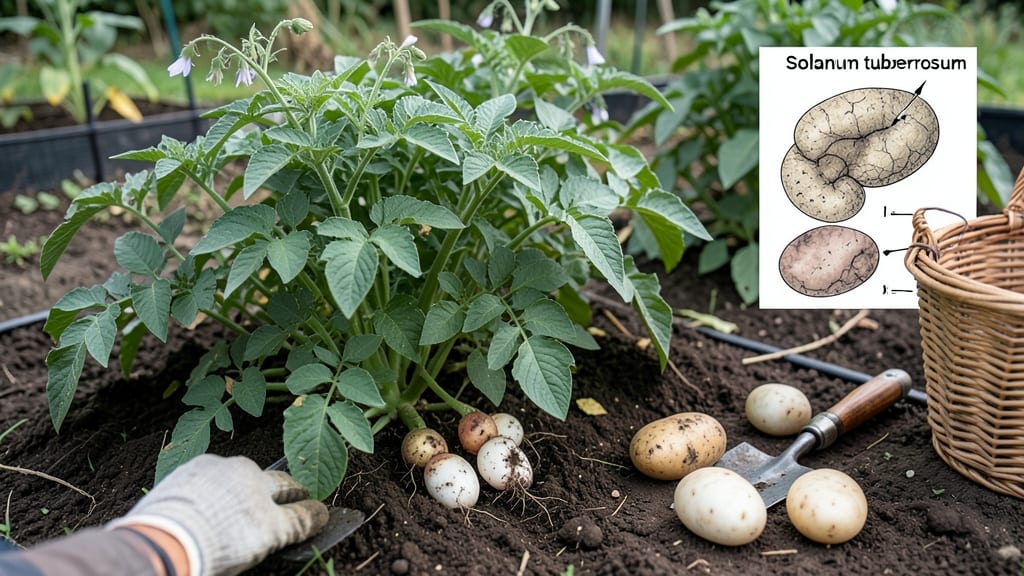
To tell when to harvest potatoes, watch for yellowing foliage, firm skin, and dry stems—these are the clearest signs your 🥔 crop is ready.
New potato harvesters often dig up their crops too early—or too late—leaving behind small tubers or tough, woody potatoes. Knowing the exact signs to harvest ensures a bountiful yield of tender, flavorful spuds.
Start by checking the leaves: when 75% turn yellow and die back naturally, it’s time to dig. For storage potatoes, wait until the skin resists pressure and the tubers are 2–3 inches wide.
In this guide, I’ll walk you through visual cues, soil checks, and seasonal timing—plus how to handle your harvest for the best flavor and storage life.
5 Visual and physical signs your potatoes are ready to harvest
Harvesting potatoes at the wrong time can ruin months of hard work—digging too early gives you small, underdeveloped tubers, while waiting too long produces tough, woody potatoes with poor flavor. The key is watching for these five clear indicators that your spuds are perfectly ripe.
I’ve learned from experience that ignoring these signs often leads to wasted crops, so pay close attention to what your potato plants are telling you.
Potatoes mature underground, so you can’t just look at the plant above soil level. Instead, focus on leaf color, flower development, tuber size, skin texture, and soil conditions. Each of these signs works together to confirm the ideal harvest window.
For example, yellowing foliage combined with firm tuber skin is a foolproof combination. Let’s break down exactly what to watch for and how to test each one.
🌱 Numbered Highlights: How to Tell When Potatoes Are Ready
- 1 Leaf Yellowing & Dieback: Foliage turns yellow-brown and wilts completely (natural senescence). This signals the plant is redirecting energy to tubers. Test: Gently tug stems—if they snap easily, it’s time to harvest.
- 2 Flower Blooms & Fade: Flowers appear and begin fading (for most varieties). Early bloomers like ‘Yukon Gold’ may not flower, but their leaves still yellow. Note: Some varieties (e.g., ‘Red Pontiac’) bloom later but follow the same leaf cues.
- 3 Tuber Size & Skin Toughness: Tubers reach 2–3 inches in diameter and skin resists your thumbnail pressure. Press a tuber gently—if it doesn’t dent, it’s ready. Exception: New potatoes can be harvested smaller (1–2 inches) when skin is still thin.
- 4 Stem End Dries & Turns Brown: The stem end (heels) of tubers darkens and feels dry to the touch. Green stem ends mean toxic solanine (avoid eating!). Pro Tip: Dig up a test tuber to check—if the stem is brown, harvest soon.
- 5 Soil Conditions & Temperature: Soil temps drop to 50–60°F (ideal for curing). Loose, well-draining soil makes digging easier. Warning: Harvesting in wet soil causes tubers to rot—wait for dry weather or use a fork to lift gently.
Timing your harvest based on these signs ensures you get tender, flavorful potatoes with minimal waste. For example, I once harvested my ‘Kennebec’ potatoes too late because I ignored the leaf yellowing—resulting in hard, mealy spuds that were nearly inedible.
The next year, I marked my calendar for when the flowers faded and tested tuber firmness, and the difference was night and day.
Another critical factor is variety type. New potatoes (like ‘Red Norland’) can be harvested earlier when tubers are 1–2 inches and skin is still thin. Meanwhile, storage varieties (e.g., ‘Russet’) need full maturity—wait until the skin is thick and rough before digging.
Always check your seed packet for days to maturity as a general guideline, but rely on the visual cues above for precision.
One common mistake I see is overwatering before harvest, which leads to soft, bruised tubers. Stop watering 1–2 weeks before digging to let the soil dry slightly and toughen the skins. This also makes the tubers easier to harvest without breaking.
Pro tip: Use a garden fork to gently loosen soil around the base of the plant before pulling—this reduces damage and makes cleanup easier.
If you’re unsure whether your potatoes are ready, perform the thumbnail test: Dig up a single tuber and press your thumbnail into the skin. If it doesn’t dent, your potatoes need more time. If it does dent, they’re perfect for immediate use.
For storage varieties, let them cure in a dark, dry place (60–70°F) for 1–2 weeks to thicken the skin and improve shelf life. This step is often overlooked but makes a huge difference in storage quality.
Finally, remember that early-maturing varieties (60–75 days) and late-maturing varieties (80–90 days) follow the same signs but on different schedules. For example, ‘Adirondack Blue’ (a heirloom) takes longer to show leaf yellowing, so I monitor it more closely.
Always adjust your expectations based on your specific potato variety and local climate conditions.
By mastering these five key signs, you’ll never again dig up potatoes too early or too late. The secret is patience and observation—your plants will tell you exactly when it’s time to harvest if you know what to look for. Happy digging! 🥔
When to harvest new vs. storage potatoes: timing matters
Harvesting potatoes at the wrong time can mean the difference between tender, flavorful new potatoes and tough, woody storage tubers. The key difference lies in soil temperature, tuber maturity, and your intended use.
For new potatoes, harvest early when tubers are small but edible—typically 50–60 days after planting. For storage potatoes, wait until full maturity, around 90–120 days, when skins toughen and foliage dies back.
Soil temperature plays a critical role: new potatoes thrive in cooler soils (60–65°F), while storage potatoes need warmer conditions (70–75°F) to develop thick skins and resist rot.
Your harvest timing also depends on your potato variety—early varieties like 'Yukon Gold' are ready in 70–80 days, while late varieties like 'Russet' need 100+ days.
Comparison Table: New vs. Storage Potato Harvesting
| Factor | New Potatoes | Storage Potatoes |
|---|---|---|
| Harvest Time | 50–60 days | 90–120 days |
| Soil Temp | 60–65°F | 70–75°F |
| Tuber Size | 1–2 inches | 2–3+ inches |
| Skin Condition | Thin, smooth | Thick, rough |
| Foliage Sign | Healthy green | 75% yellow/died |
| Watering | Keep moist | Reduce 1–2 weeks before |
For new potatoes, I recommend harvesting when tubers are 1–2 inches wide and the plant still looks healthy. Use a garden fork to gently loosen soil around the base, then pull up a few tubers to check size.
Replant the rest—they’ll continue growing! For storage potatoes, wait until foliage turns completely yellow and dies back. This signals the tubers have fully matured and developed protective skins.
Handling matters just as much as timing. After harvesting, let new potatoes dry in the sun for 1–2 hours before storing in a cool, dark place. For storage potatoes, cure them in a dark, humid space (60–70°F) for 7–10 days to thicken skins.
Avoid washing tubers until ready to use—moisture speeds up rot.
Pro tip: If you’re unsure whether your potatoes are ready, dig up one plant as a test. Check tuber size and skin thickness—this gives you a clear signal for the rest of your crop. Overharvesting too early reduces yield, while waiting too long risks tough, stringy potatoes.
Remember, soil type affects harvest timing too. Sandy soils warm faster, speeding up maturity, while clay soils stay cooler and slow growth. Adjust your expectations based on your garden’s conditions for the best results.