
How To
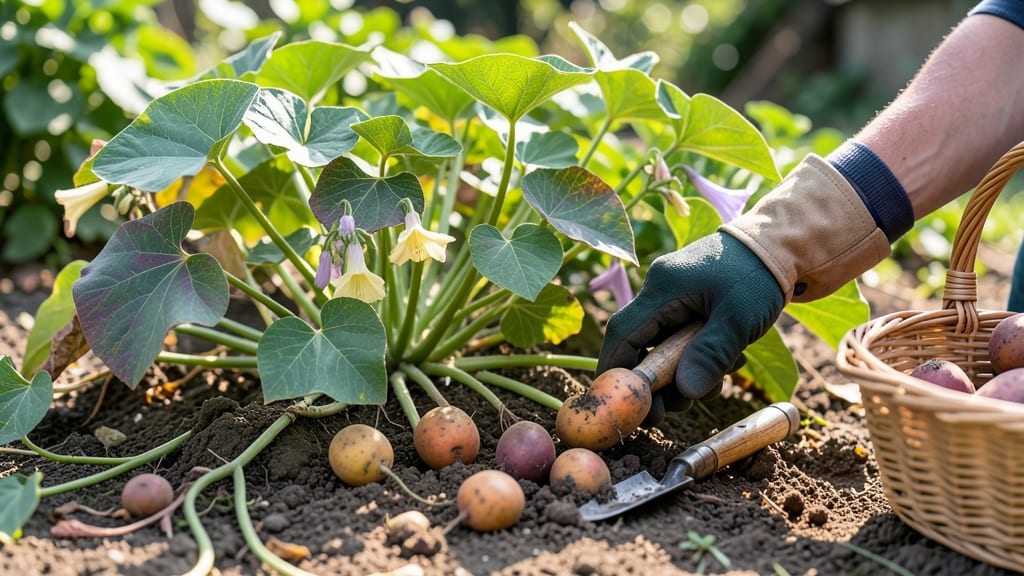
To know when to harvest sweet potatoes, watch for three key signals: leaf yellowing, skin firmness, and the telltale "slip" test where the tuber peels away from the soil with gentle pressure.
Sweet potatoes left in the ground too long turn starchy and lose flavor, while harvesting too early means small, underdeveloped tubers—here’s how to nail the perfect harvest timing for sweet, firm roots every time.
Start by checking the vines: when 75% of the foliage yellows and dies back, it’s time to act. Then dig a small test hole to inspect the tubers—if the skin slips free and feels firm (not mushy), you’re ready.
Below, I’ll walk you through the exact steps, including how to avoid frost damage, cure your harvest for maximum sweetness, and store them for months without spoilage.
5 Key signs your sweet potatoes are ready for harvest
Harvesting sweet potatoes at the right time makes all the difference between starchy, bland tubers and sweet, flavorful roots packed with nutrients. Unlike regular potatoes, sweet potatoes need specific visual and tactile cues to signal readiness.
Ignoring these signs often leads to overgrown or shrunken tubers that spoil quickly. The good news? With just a few simple checks, you can determine the perfect moment to harvest for maximum yield and quality.
Timing is everything when it comes to sweet potatoes. Harvest too early, and you’ll end up with small, underdeveloped tubers that lack sweetness. Leave them in the ground too long, and they’ll become woody or prone to frost damage.
The key lies in observing both above-ground foliage and below-ground tubers. I’ve learned that combining visual inspection with tactile tests—like the skin slip test—gives the most accurate results. Let’s break down the five foolproof signs your sweet potatoes are ready for harvest.
🌱 5 Key Signs Your Sweet Potatoes Are Ready
-
🟠 1. Foliage Yellows and Dies Back
The leaves turn yellow and crispy, signaling the plant is redirecting energy to the tubers. -
👃 2. Skin Slip Test Passes
Gently press a thumbnail against the tuber skin—if it slips easily, it’s ready. -
🍠 3. Deep, Consistent Tuber Color
Orange, red, or purple hues indicate full maturation (no pale or green spots). -
✂️ 4. Stem End Hardens and Turns Brown
The stem end should feel firm and change from green to brown. -
🌡️ 5. Vines Begin to Wither Before Frost
Harvest 2–3 weeks before the first frost to avoid tuber damage.
The first sign you’ll notice is the foliage turning yellow and crispy. This is your plant’s way of telling you it’s redirecting energy to the tubers. In my garden, I’ve seen this happen around 90–110 days after planting, depending on the variety.
Don’t wait until the vines are completely dead—harvest when about 50–70% of the leaves have yellowed. This timing ensures the tubers have reached their peak size and sweetness without becoming overgrown.
Next, perform the skin slip test, which is my go-to method for confirming readiness. Dig up one tuber and gently press your thumbnail against the skin. If the skin slips easily without puncturing the flesh, the tuber is ready.
If it resists or the skin tears, wait a few more days. This test works because the skin naturally hardens and separates from the flesh as the tuber matures. I’ve found that tubers passing this test consistently yield the best flavor and storage life.
Pay close attention to the tuber color and texture. Mature sweet potatoes develop a deep, consistent color—whether orange, red, or purple—with no green or white patches. The skin should also feel smooth and firm, not tight or easily punctured.
In my experience, pale or inconsistent colors indicate the tubers need more time in the ground. For example, my Beauregard variety always develops a rich orange hue when fully mature, while purple varieties like Georgia Jet turn deep violet.
The stem end is another critical indicator. When sweet potatoes are ready, the stem end (the part still attached to the vine) will harden and turn brown. If it remains green and soft, the tuber isn’t fully mature.
This change happens because the plant stops sending nutrients to the stem as it focuses on the tuber. I’ve learned to check this sign last because it’s often the most reliable—especially in humid climates where foliage might yellow prematurely.
Finally, keep an eye on the weather forecast. Sweet potatoes are frost-sensitive, and even a light frost can damage the tubers. Harvest 2–3 weeks before the first frost to give yourself time to cure and store them properly.
In USDA Zone 6a, where I garden, this usually means harvesting by late September or early October. If frost is imminent and your tubers aren’t ready, cover the plants with row fabric or mulch to buy a few extra days.
Once you’ve confirmed all five signs, it’s time to harvest. Use a fork or hands to gently loosen the soil around the base of the plant, then lift the tubers carefully to avoid bruising.
Avoid washing them immediately—let them cure in a dry, warm place for 5–10 days to develop their full sweetness. Proper curing is the secret to long-term storage and rich flavor, and I’ll cover that process in detail in the next section.
Mastering these five signs will transform your sweet potato harvest from hit-or-miss to consistently perfect. The more you practice these checks, the more intuitive the process becomes. Happy harvesting—and enjoy those sweet, homegrown tubers! 🍠
Sweet potato harvesting mistakes that ruin your crop
Harvesting sweet potatoes at the wrong time can turn your hard work into a disappointing pile of small, watery tubers or tough, flavorless roots. I’ve seen gardeners lose 50% of their crop by ignoring these three critical mistakes: harvesting too early, waiting for frost, and improper post-harvest handling.
The biggest mistake is digging too early—when tubers are still small and underdeveloped. You’ll end up with baby sweet potatoes that lack the sweetness and storage life of fully mature ones.
Even worse, leaving them too long in the ground exposes them to frost, which turns their flesh mushy and inedible.
Check these three signs before digging:
- 75% of foliage has yellowed and died back (natural vine senescence)
- Skin slip test: Gently pull back soil—if the tuber peels away easily, it’s ready
- Firmness test: Press thumbnail into skin—it should resist pressure without puncturing
If frost is forecast within 7-10 days, harvest immediately—even if tubers aren’t perfect size. Frost ruins sweet potatoes faster than you can cure them!
Another costly error is improper curing. Sweet potatoes need 5-10 days at 80-85°F with 80% humidity to develop their signature sweetness. Skipping this step leaves tubers bland and prone to spoilage.
I’ve cured harvests in my garage using a space heater and humidity tray, and the difference in flavor is night and day.
Storage mistakes are equally damaging. Many gardeners assume sweet potatoes can go straight into the fridge, but cold temperatures (below 55°F) trigger chilling injury, turning their flesh gray and watery.
Instead, store them in a cool, dark, well-ventilated area (like a root cellar or pantry) where temps stay between 55-60°F.
Even after proper harvest and curing, physical damage during handling can ruin your crop. Bruised tubers spoil faster, and cuts create entry points for rot. Always handle sweet potatoes gently with clean hands—never toss them in a basket or drag them across rough surfaces.
To maximize your yield, time your harvest with the first frost date in your zone. In my Zone 6a garden, I aim to harvest by mid-October before temperatures drop below 50°F at night.
Use a frost calendar for your area, and mark your planting date 90-110 days earlier to align with ideal harvest windows.