
How To
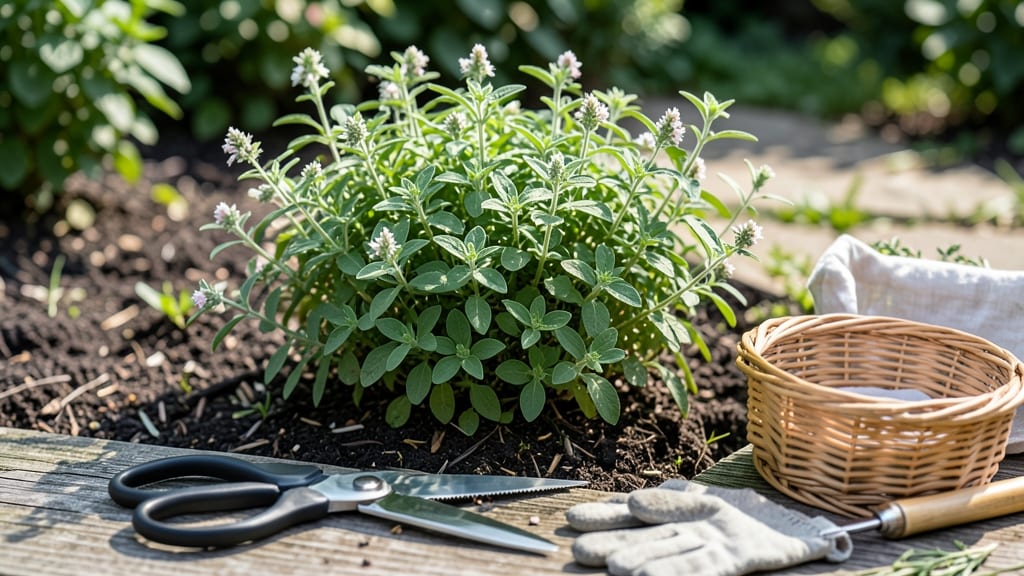
To harvest marjoram at its peak flavor, time your cuts just as the leaves are fully developed but before flowering 🌿—this simple window makes all the difference.
Harvesting marjoram at the right time ensures maximum flavor and encourages bushier growth—yet many gardeners miss the best window or use improper techniques that harm the plant.
A few wrong snips can turn your fragrant herb into a leggy shadow of itself, and that’s exactly what I almost did my first year growing it.
You’ll want to grab your pruners early in the morning when the oils are most concentrated, and always cut just above a leaf node to spur new growth. The key is consistency: a little every few weeks keeps your marjoram thriving, while aggressive pruning can stunt it for months.
In this guide, I’ll walk you through the exact steps to harvest marjoram without damaging the plant, plus how to preserve your harvest and avoid the three biggest mistakes that ruin even the hardiest plants.
When to harvest marjoram for peak flavor and plant health
Timing your marjoram harvest correctly is the secret to unlocking its boldest flavor while keeping your plant thriving. Unlike some herbs that tolerate aggressive harvesting, marjoram rewards patience with fragrant, tender leaves and encourages bushier regrowth.
The key lies in recognizing the ideal growth stage—when leaves are fully developed but before flowering begins. Harvest too early, and you’ll get weak, underdeveloped foliage; wait too long, and the plant shifts energy to seed production, leaving behind bitter, woody stems.
Weather plays a crucial role too. The best harvest window occurs on dry, sunny mornings after dew has evaporated but before the midday heat. This timing preserves the plant’s essential oils (responsible for flavor and aroma) and prevents fungal issues from overnight moisture.
If you must harvest later in the day, do so in the late afternoon to avoid stressing the plant during peak heat. Rainy days should be avoided entirely—wet leaves are more prone to disease and flavor loss.
Here’s what your marjoram should look like when it’s ready for harvest:
| Growth Stage | Plant Height | Leaf Characteristics | Harvest Tip |
|---|---|---|---|
| Early Growth (Not Ready) | Under 6 inches | Small, sparse leaves; weak aroma | Wait until plant is bushier |
| Ideal Harvest Stage | 6–12 inches tall | Fully developed, dark green leaves; strong fragrance | Trim outer leaves first |
| Pre-Flowering (Last Chance) | 12–18 inches tall | Leaves may taste slightly bitter; flowers budding | Harvest lower stems for regrowth |
| Post-Flowering (Avoid) | 18+ inches tall | Woody stems; bitter flavor | Prune back to encourage new growth |
One of the most common mistakes gardeners make is over-harvesting marjoram, which weakens the plant and reduces future yields. To avoid this, never remove more than one-third of the plant in a single session.
Focus on selective trimming—snip individual stems or clusters of leaves rather than shearing the entire plant. This method encourages bushier regrowth and maintains the plant’s vigor. For example, if your marjoram has reached 12 inches, trim the top 2–3 inches of the main stem to promote branching.
Another pro tip: Harvest regularly throughout the growing season to prevent the plant from becoming leggy. When you see new growth emerging from the base, it’s a sign your marjoram is responding well to your harvesting routine.
Consistency is key—aim to harvest every 4–6 weeks during peak growing months (June–September in most climates). This schedule aligns with marjoram’s natural growth cycle and ensures you always have fresh, flavorful leaves on hand.
The fragrance test is my favorite way to check readiness. Simply crush a few leaves between your fingers—if they release a strong, sweet citrusy aroma, they’re prime for harvesting. Weak or no scent? Wait a few more days.
This simple trick saves you from picking underdeveloped leaves that won’t deliver the bold flavor you crave in cooking. Pro chefs and herbalists swear by this method, and it’s a game-changer for home gardeners too.
Seasonal timing matters just as much as growth stage. In USDA Zone 6a (where marjoram thrives), the primary harvest window opens in late spring (after the last frost, around mid-April) and extends through early fall (until the first frost in mid-October).
If you planted marjoram in early fall (September–October), you can expect a second harvest window the following summer. Always harvest before hard frosts, as cold temperatures turn leaves bitter and mushy.
For container-grown marjoram, timing adjustments are minimal, but pot size matters. Plants in 5-gallon containers or larger have more root space to recover from harvesting, so you can trim more aggressively.
Smaller pots (under 2 gallons) may struggle with frequent harvesting, so limit yourself to smaller cuts every 6–8 weeks. Overcrowded roots in small containers can also lead to stunted growth, so upgrade pots if your marjoram outgrows its current home.
Finally, never harvest marjoram after it’s bolted (sent up a tall flower stalk). Once flowering begins, the plant’s energy shifts from leaf production to seed development, and the leaves become woody and bitter.
If you miss the harvest window, don’t panic—simply prune back the flowers and give the plant a light fertilizer to encourage new leaf growth. With proper care, marjoram can produce multiple harvests per season, making it one of the most rewarding herbs to grow.
Step-by-step marjoram trimming techniques for continuous yields
Trimming your marjoram properly isn't just about harvesting—it's about encouraging bushier growth and extending your harvest season. When done correctly, regular pruning keeps your plant healthy, productive, and full of flavorful leaves.
The key lies in using the right cutting techniques and timing them with your plant's natural growth cycle.
Start by selecting the right tools for the job: sharp pruning shears or clean scissors work best. Dull tools can crush stems and invite disease, so always keep your blades sharp.
Aim to trim your marjoram early in the morning when the plant is hydrated, making it easier to handle and reducing stress on the plant.
How to Harvest Marjoram: Step-by-Step Guide
Choose healthy stems with at least 3-4 sets of leaves. Avoid cutting into bare stems or woody growth.
Use clean pruning shears to cut just above a leaf node at a 45-degree angle. This encourages new growth.
Harvest no more than 1/3 of the plant at once to avoid shocking it. Focus on the outer stems first.
After harvesting, remove any yellow or damaged leaves to improve airflow and prevent disease.
For bushier growth, pinch back the tips of new shoots regularly to encourage branching.
In late summer, trim back woody stems to promote fresh, tender growth for a fall harvest.
To keep your marjoram thriving, focus on seasonal maintenance. In spring and early summer, prioritize harvesting the youngest leaves for the best flavor. As the plant matures, you can trim more aggressively, but always leave enough foliage to support photosynthesis.
This balance ensures your plant stays productive year-round.
One of my favorite tricks is to harvest flowers before they open. While marjoram flowers are edible, removing them redirects the plant's energy into leaf production, keeping your harvest abundant.
Just be sure to leave a few flowers to encourage pollinators and maintain plant health. With these techniques, you'll enjoy fresh marjoram from early summer through fall.
Remember, consistency is key. Regular trimming—not just when you need leaves—keeps your marjoram compact, flavorful, and ready for your next culinary project. A little effort now means a longer harvest season and a healthier plant for years to come. 🌿✂️