
How To
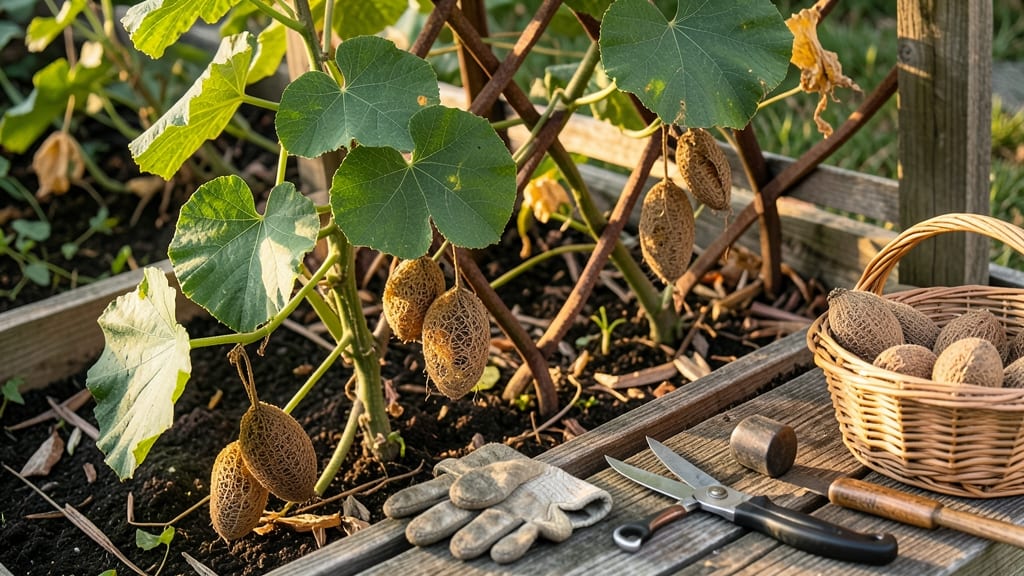
Harvesting loofah sponges from your mature 🌿 plants is simpler than you’d expect—and the results are worth the effort.
Imagine transforming those unsightly yellow-brown pods into soft, natural sponges that rival store-bought versions. With the right timing and technique, you can turn your loofah harvest into a sustainable, eco-friendly solution for your kitchen or bathroom.
In this guide, I’ll walk you through the exact steps to identify when your loofah pods are ready, how to harvest them properly, and the best methods for drying and curing them for long-term use.
You’ll learn the best time of day to pick, the tools you’ll need, and how to avoid common mistakes that ruin sponge quality. By the end, you’ll have everything you need to turn your loofah plants into a game-changer for your home.
When and how to identify loofah pods ready for harvesting
Harvesting loofah sponges at the perfect moment transforms your garden into a natural sponge factory. The key lies in watching for visual cues that signal maturity—typically 60 to 90 days after flowering. When pods turn from green to yellow-brown and develop a woody texture, they’re ready to pick.
Timing is everything because harvesting too early means soft, unusable pods, while waiting too long risks over-drying or seed loss.
Start by examining the pod color. Mature loofahs shift from vibrant green to a dull yellow-brown, almost like a ripe banana. This color change indicates the inner fibers have fully developed into the sponge-like material we use.
Run your fingers over the pod’s surface—if it feels hard and dry instead of soft and squishy, it’s time to harvest. A gentle squeeze should reveal a hollow, rattling sound from the seeds inside.
Another telltale sign is the stem’s condition. When loofah pods are ready, the stem connecting them to the vine will dry out and detach easily with a slight twist. This natural separation is your garden’s way of saying, “Pick me now!”
Ignoring this cue can lead to pods splitting open on their own, scattering seeds and reducing sponge quality. Pay close attention to the pod’s size too—mature loofahs typically grow 2 to 3 feet long, though some varieties can reach even longer.
| Stage | Visual Cues | Action |
|---|---|---|
| Immature | Green, firm, soft skin | Wait 2-3 weeks |
| Ripening | Yellowing, slightly wrinkled | Monitor daily |
| Mature | Yellow-brown, hard, rattling seeds | Harvest immediately |
| Overripe | Dry, cracked, seeds scattered | Too late—discard |
Morning is the best time of day to harvest loofah pods because the dew has evaporated, reducing the risk of fungal issues. Use a sharp pair of pruning shears or a knife to cut the stem about 1 inch below the pod.
This prevents damage to the vine and makes handling easier. Avoid pulling pods off by hand, as this can tear the vine and leave unsightly marks. Once harvested, rinse the pods gently with water to remove dirt, but avoid soaking them—excess moisture speeds up spoilage.
The ideal harvest window spans from late summer to early fall, typically October through December in most tropical and subtropical climates. If you’re growing loofahs in USDA zones 9-11, aim to harvest before the first frost, though loofahs aren’t frost-tolerant.
In cooler regions, you might need to extend the growing season with row covers or grow them in containers that can be moved indoors. Keep an eye on your plants’ progress, as varieties differ slightly in maturity timelines.
Don’t confuse loofah pods with zucchini or cucumbers—they’re entirely different! Loofahs belong to the Cucurbitaceae family, like cucumbers and pumpkins, but their rough, fibrous texture sets them apart. If you’re unsure, check for the characteristic ridges along the pod’s length and the hard, woody feel.
Once you’ve identified a mature pod, act quickly—loofahs dry out fast once detached from the vine, so prioritize harvesting over other garden tasks.
Pro tip: Label your loofah plants if you’re growing multiple varieties, as some may mature faster than others. This helps you keep track of which pods are ready and which still need time.
For example, Luffa aegyptiaca (Egyptian loofah) tends to mature slightly faster than Luffa cylindrica (Chinese loofah). Jot down the harvest dates in a garden journal to refine your timing for next year’s crop.
If you miss the harvest window, don’t worry—loofah pods can remain on the vine for a few extra days, but their quality declines rapidly. Overripe pods may split open, releasing seeds and leaving behind a brittle, unusable shell.
To salvage partially dried pods, place them in a well-ventilated area for a few more days to complete the drying process. However, the best sponges always come from pods harvested at peak maturity.
Finally, remember that patience is key when harvesting loofahs. Rushing the process leads to poor-quality sponges, while waiting too long can result in wasted effort.
By mastering these visual and tactile cues, you’ll consistently harvest loofahs at their prime, ready for the next step: drying and transforming them into luxurious, eco-friendly sponges for your home. 🌿
Step-by-step process for harvesting and drying loofah sponges
Once your loofah pods turn that signature yellow-brown and split open, it’s time to harvest them before they degrade. The key to a high-quality sponge lies in proper timing and technique—skipping steps here can ruin your final product.
I’ve harvested hundreds of loofahs over the years, and the difference between a soft, pliable sponge and a brittle mess comes down to these exact methods. Let’s dive into the step-by-step process to ensure you get the best results every time.
- 1 Harvest at the right time: Pick pods when they’re completely yellow-brown, dry, and split open naturally. Shake them—if seeds rattle inside, they’re ready.
- 2 Gather your tools: Use clean pruning shears, a glove (to avoid skin irritation), and a bucket for collecting pods. A label maker helps track harvest dates.
- 3 Cut stems cleanly: Snip the stem 1-2 inches from the pod using pruning shears. Avoid tearing the skin—this prevents rot during drying.
- 4 Rinse pods thoroughly: Remove all outer skin and seeds by scrubbing pods under running water. Use a soft brush to avoid damaging the fibrous interior.
- 5 Choose a drying method: Sun-drying (3-4 weeks) works best in warm climates, while indoor drying (4-6 weeks) uses a dehumidifier or fan in cooler areas.
- 6 Cure for 2-4 weeks: Once fully dry, place pods in a well-ventilated area for 2-4 weeks to soften. Avoid direct sunlight—it can bleach the sponge.
- 7 Store properly: Keep cured sponges in a cool, dry place wrapped in breathable fabric to prevent mold. They’ll last years if stored correctly!
Sun-drying is my preferred method because it’s free and speeds up the process. Simply lay pods on a screen or mesh rack in direct sunlight, flipping them daily to ensure even drying.
If you live in a humid climate, indoor drying with a fan or dehumidifier is the way to go.
Patience is key here—rushing the drying process can leave your sponges brittle and unusable. I once tried to speed things up by using an oven, but the result was a hard, crumbly mess. Stick to natural methods for the best texture.
Once your loofahs are fully cured, they’ll transform into luxurious, natural sponges that rival anything you’d buy in a store. The satisfaction of turning something you grew into a useful product is unmatched!