
How To
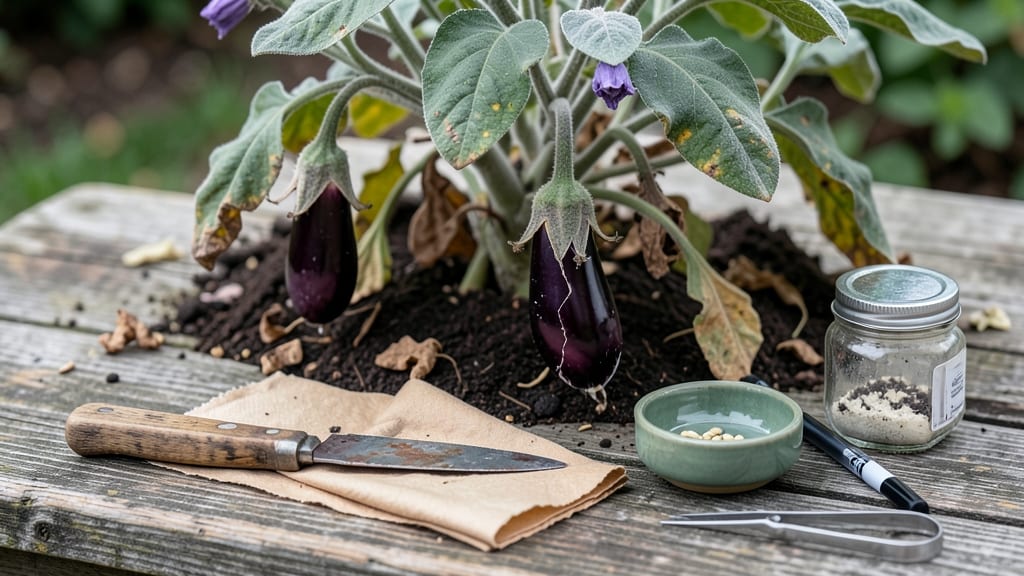
To harvest eggplant seeds from your homegrown 🍆, you’ll need to time the process just right after the fruit fully ripens—when the skin turns deep purple and the flesh is soft but not mushy.
Did you know you can save seeds from your eggplants to grow next year’s crop—saving money and ensuring heirloom quality? Harvesting eggplant seeds is simpler than you think, but timing and technique make all the difference.
Most gardeners overlook this step, missing out on the cost savings and the satisfaction of growing plants true to their favorite varieties. The key is letting the fruit stay on the vine until it’s completely overripe, then fermenting the seeds to remove bad ones.
In this guide, I’ll walk you through when to collect seeds, how to extract and clean them, and the best storage methods to keep them viable for years—so you can start your next garden with confidence.
When and how to select eggplants for seed harvesting
Saving seeds from your eggplants is a rewarding way to preserve heirloom varieties and reduce next year’s gardening costs. But not all eggplants are suitable for seed harvesting—organic, open-pollinated varieties are your best bet.
Hybrid eggplants, like many grocery store types, won’t produce true-to-type seeds, so skip those if you want consistent results.
The key to successful seed saving starts with selecting the right eggplants at the perfect ripeness stage. Overripe fruits yield the best seeds, but they must be fully mature—not just slightly past their prime.
Look for fruits that are deep purple or black, slightly soft to the touch, and have begun to crack or split naturally. These signs indicate the seeds are ready for harvest.
Seasonal timing also plays a critical role. In most climates, aim to harvest seeds from eggplants grown in late summer or early fall, typically between September and October. This ensures seeds have fully matured in warm conditions before cooler temperatures set in. If you’re in a shorter growing season, prioritize varieties with shorter maturity dates (around 60-70 days) to maximize your chances.
| Selection Criteria | Details |
|---|---|
| Eggplant Type | Open-pollinated or heirloom varieties only (e.g., 'Black Beauty', 'Ichiban', 'Rosa Bianca') |
| Fruit Ripeness | Deep color, slightly soft, natural cracks or splits |
| Seasonal Timing | Late summer to early fall (September-October in most zones) |
| Avoid Hybrids | Hybrids (e.g., 'Fairy Tale', 'Rosa Bianca F1') won’t produce true seeds |
| Pollination Control | Isolate plants or hand-pollinate to prevent cross-contamination |
One common mistake is assuming all eggplants are suitable for seed saving. Hybrid varieties, which make up most commercial eggplants, are bred for specific traits like disease resistance or uniform shape.
Their seeds won’t grow into plants identical to the parent, so they’re a waste of time for seed saving. Stick to open-pollinated or heirloom types like 'Black Beauty', 'Ichiban', or 'Rosa Bianca' for reliable results.
If you’re growing multiple eggplant varieties in your garden, isolation is key to avoid cross-pollination. Eggplants are self-pollinating, but bees can transfer pollen between different varieties. To maintain purity, plant varieties at least 500 feet apart or use row covers during flowering.
For small gardens, hand-pollinate flowers using a small brush to transfer pollen from one flower to another within the same variety.
When selecting eggplants for seed harvesting, prioritize fruits that show visible signs of overripeness. These include a deep, even color, a slightly wrinkled or cracked skin, and a soft texture when pressed. Overripe eggplants may look unappetizing, but their seeds are the most viable.
Cut open the fruit to check for fully developed, plump seeds embedded in a gel-like pulp—this is your cue that the seeds are ready for extraction.
For gardeners in cooler climates, consider growing early-maturing varieties specifically for seed saving. Varieties like 'Little Wonder' or 'Patio Baby' mature in as few as 60 days, giving you a head start on seed development before frost.
Even if the fruit isn’t fully ripe by the first frost, you can harvest and ripen indoors by placing the eggplants in a warm, dry location for a few weeks.
Labeling your eggplant varieties is a non-negotiable step if you’re saving seeds from multiple types. Use waterproof tags or a permanent marker to label each plant at the start of the season.
Include the variety name, planting date, and any notable traits (e.g., disease resistance). This ensures you’ll know exactly which seeds you’re harvesting and can replicate successful plants next year.
Finally, don’t overlook the importance of healthy parent plants. Only save seeds from eggplants that were disease-free and thrived in your garden. Weak or diseased plants may produce seeds that don’t grow well or are prone to the same issues.
Choose the strongest, most productive plants in your patch for seed harvesting to set yourself up for success in future seasons.
With the right varieties, timing, and techniques, you’ll be well on your way to harvesting high-quality eggplant seeds that grow into robust plants year after year. Happy gardening! 🌱
Step-by-step guide to extracting and drying eggplant seeds
Now that you’ve selected your ripe eggplants for seed saving, the next step is extracting and preparing those seeds for storage. This process ensures high germination rates and eliminates weak or non-viable seeds.
The key is patience—rushing can lead to moldy seeds or poor results. Let me walk you through each step, from slicing open the fruit to drying the seeds properly.
First, you’ll need a few simple supplies: a sharp knife, a bowl for fermenting, a fine mesh strainer or cheesecloth, and paper towels for drying. The goal is to separate the seeds from the gelatinous pulp, ferment them to remove bad seeds, and then dry them thoroughly.
Skipping any step can reduce your seed viability, so let’s dive into the process with precision.
- 1 Slice and Scoop: Cut the eggplant in half lengthwise and scoop out the seeds and gelatinous pulp into a bowl. Use a spoon to avoid damaging the seeds.
- 2 Ferment the Mixture: Cover the bowl with a lid or cloth and let it sit at room temperature (70-75°F) for 2-3 days. This fermenting process helps separate viable seeds from the pulp and kills weak seeds.
- 3 Rinse and Strain: After fermenting, stir the mixture and pour it through a fine mesh strainer or cheesecloth. Rinse the seeds under cool water to remove any remaining pulp.
- 4 Inspect for Viability: Spread the seeds on a paper towel to dry. Discard any seeds that are discolored, shriveled, or floating during fermenting—they won’t germinate.
- 5 Dry Thoroughly: Place the seeds in a single layer on a clean paper towel or screen in a warm, dry place (like a sunny windowsill). Stir them daily to ensure even drying, which takes 3-5 days.
- 6 Store Properly: Once completely dry (they should crinkle slightly when touched), store seeds in a paper envelope or airtight container in a cool, dark place for up to 3 years.
One common mistake is skipping the fermenting step, which can lead to moldy seeds or poor germination. If you notice mold growth during fermenting, discard the mixture immediately and start over with fresh pulp.
Also, avoid drying seeds in direct sunlight for too long, as this can overheat and kill them. Keep an eye on humidity levels—high humidity can cause seeds to spoil.
Pro tip: Label your seed envelopes with the variety name and harvest year to avoid confusion later. I like to include a small note about the eggplant’s color or size if it’s a unique heirloom variety. This ensures you’ll remember exactly what you’re planting next season!
With these steps, you’ll have high-quality eggplant seeds ready for your next planting season. The satisfaction of growing plants from seeds you saved yourself is unmatched—plus, you’ll save money and preserve the exact traits you love in your garden.