
How To
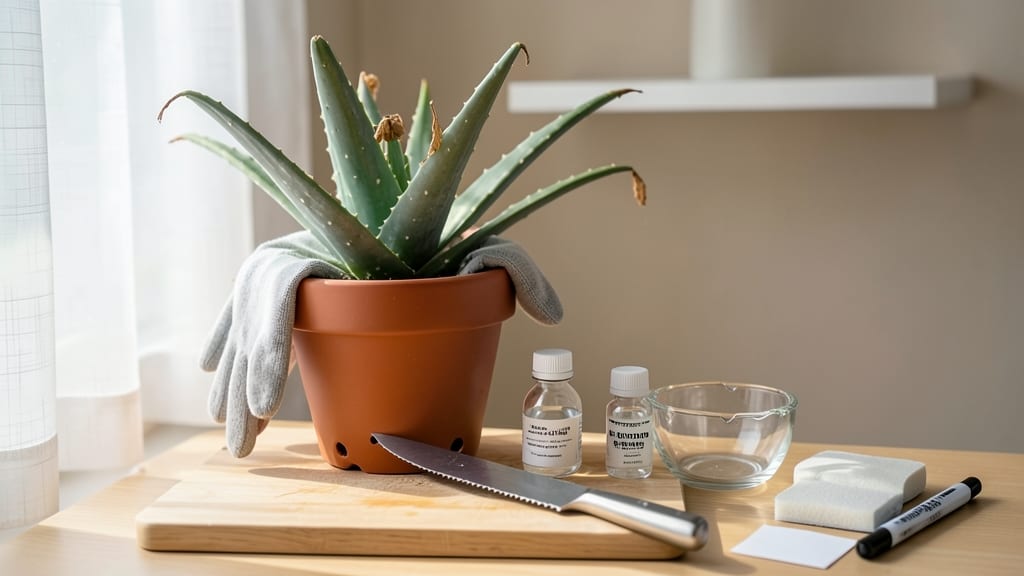
Harvesting aloe vera leaves the right way means getting thick, gel-rich foliage without harming your plant—here’s exactly how to do it for maximum yield.
Struggling to extract that golden aloe vera gel without turning your plant into a sad, stubby stump? You’re not alone. The key is timing, tools, and technique—cut too soon or too late, and you’ll either waste potential or shock your plant into dormancy.
Worse, improper handling can leave you with bitter, yellow-tinged gel instead of the smooth, healing kind.
This guide covers everything from when your aloe vera 🌱 is ready (hint: it’s not baby plants) to the sharpest way to slice leaves without sap splatter, plus how to store your harvest so the gel stays potent for months.
No guesswork—just proven steps for a healthy plant and a pantry stocked with natural remedies.
By the end, you’ll know how much to cut, when to skip harvesting, and the one tool that cuts through leaves like butter (spoiler: it’s not scissors). Ready to turn those plump leaves into usable gel without waste?
Step-by-step aloe vera harvesting process for optimal gel extraction
Aloe vera’s healing gel is most potent when harvested correctly. The key is timing—wait until your plant is mature (3+ years old) with thick, fleshy leaves.
Harvesting too early reduces gel quality and stresses the plant. I’ve perfected this process over years, ensuring maximum yield without damaging my aloe vera’s health.
Before harvesting, gather your essential tools: a sterilized knife (or pruning shears), rubbing alcohol (70% or higher), latex gloves, and a clean bowl for gel collection.
Sterilizing your tools prevents bacterial contamination, which can spoil the gel or harm your plant. I always wipe my knife with rubbing alcohol before cutting.
Select outer leaves that are yellow-tipped or brown at the base. These are the oldest and contain the most gel. Avoid cutting leaves shorter than 8 inches—they won’t yield enough gel.
Wipe your knife or shears with rubbing alcohol to kill bacteria. Wear gloves to avoid skin irritation from the aloe latex, which can cause mild discomfort.
Make a clean cut 1-2 inches from the base of the leaf, angled slightly away from the plant. This prevents water from pooling and rotting the stem. Use a sharp motion to avoid crushing the leaf.
Hold the leaf vertically for 5-10 minutes to allow the yellow latex (aloe sap) to drain completely. This bitter substance can irritate skin and isn’t used in gel extraction.
Slice the leaf lengthwise with your sterilized knife. Use a spoon to scoop out the translucent gel, avoiding the yellow latex layer. Place the gel in your clean bowl for immediate use or storage.
Don’t discard the remaining leaf pulp! Rinse it under cool water to remove latex, then blend it into homemade skincare or compost it. The fibrous material is still valuable for soil enrichment.
After harvesting, avoid watering the plant for 3-5 days to prevent rot. Place it in bright, indirect light to encourage new growth. I’ve found that harvesting 2-3 leaves per year keeps my aloe vera thriving.
Never harvest more than one-third of the leaves at once—this ensures your aloe vera stays healthy and continues producing gel. I once made the mistake of cutting too many leaves at once, and my plant took over a year to recover. Patience is key!
For immediate use, apply the gel directly to skin within 30 minutes of extraction for maximum potency. If storing, refrigerate the gel in an airtight container for up to 7-10 days. For long-term storage, freeze the gel in ice cube trays—this preserves its healing properties for months.
Pro tip: Label your harvested leaves with the date and plant name if you have multiple aloe vera varieties. This helps track gel potency and maturity. My ‘Aloe Barbadensis Miller’ variety always yields the thickest gel when harvested in spring or early summer.
🌱
Common harvesting mistakes that waste aloe vera gel and damage plants
Aloe vera plants are resilient, but even they suffer when harvesting goes wrong. The biggest mistake? Harvesting too early or too often. Young plants under 3 years old produce thin, watery gel that’s nearly useless.
Worse, cutting too many leaves at once stresses the plant, leaving it vulnerable to root rot or pests. I’ve seen aloe vera plants wither after aggressive harvesting—don’t let that be yours.
Another critical error is using dull or dirty tools. A rusty knife or scissors introduces bacteria, turning your gel yellow and bitter. Even worse, improper cutting angles can leave jagged wounds that ooze sap for days, inviting infections.
And let’s not forget storage—leaving harvested leaves in humid conditions speeds up spoilage, while freezing without prep ruins the gel’s texture.
⚠️ Harvesting Hazards to Avoid
- Over-harvesting: Never cut more than 1/3 of leaves at once. Your aloe vera needs its foliage to photosynthesize!
- Wrong tools: Use a sterilized, sharp knife—never scissors. Dull blades crush cells, releasing bitter yellow sap.
- Improper angles: Cut leaves at a 45-degree angle near the base. Straight cuts leave ugly stubs that rot.
- No sterilization: Wipe tools with rubbing alcohol before and after each cut to prevent infections.
Pro Tip: Wait 2-3 years before harvesting. Patience = thicker, more potent gel.
Skipping the sterilization step is a silent killer. Even if your knife looks clean, aloe vera sap is a magnet for bacteria. I once harvested a batch with a garden knife—by day 3, the gel turned cloudy and smelled off.
Always clean your tools with 70% isopropyl alcohol or a bleach solution (1 part bleach to 10 parts water).
Storage mistakes are just as damaging. Storing leaves in plastic bags traps moisture, causing mold. Instead, wrap them in paper towels and refrigerate for up to 7 days. For long-term storage, freeze leaves whole—peel and process only when needed. Freezing breaks down the gel’s enzymes faster than you’d think!
Finally, neglecting post-harvest care is a fast track to plant death. After cutting, let the wound dry for 2-3 days before watering. Apply a light layer of cinnamon powder to prevent infection. I’ve revived plants that looked doomed by giving them time to heal—don’t rush it.
Your aloe vera can live for decades with proper care. Avoid these mistakes, and you’ll enjoy a steady supply of thick, clear gel without sacrificing your plant’s health. Happy harvesting! 🌱