
Vegetables
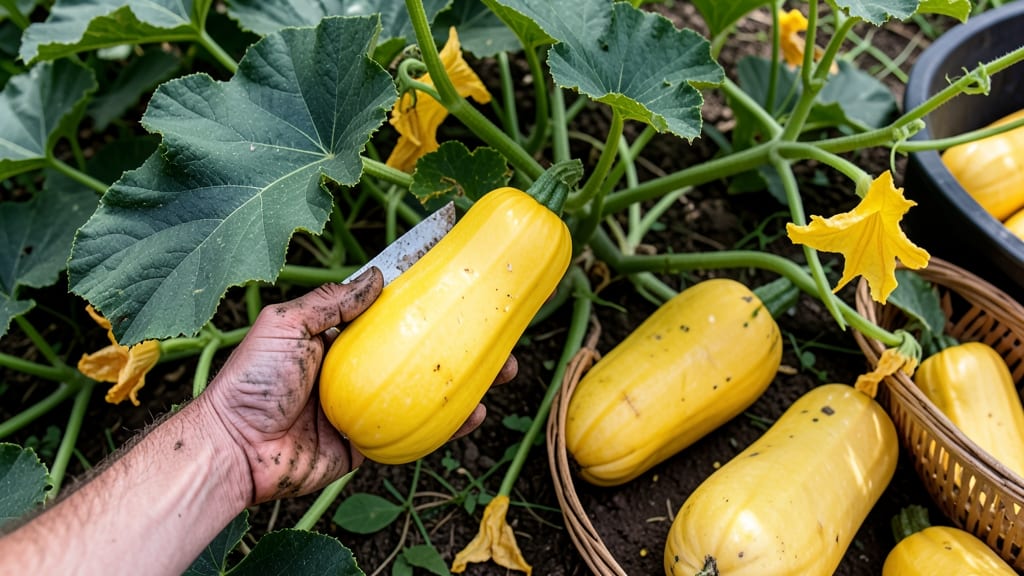
Harvesting yellow summer squash 🍆 at the right time means the difference between a tender, flavorful meal and a tough, seedy disappointment.
Picture this: you’ve nurtured your plants all season, and now the moment of truth arrives—when to pick those bright yellow beauties for that perfect crunchy texture and sweet taste. Get it wrong, and you’re left with oversized, bitter squash that’s more trouble than it’s worth.
Most gardeners wait too long, but the key is simple: harvest when the squash is 6-8 inches long, the skin yields slightly to gentle pressure, and the stem snaps cleanly. These cues tell you the moment is now—before the seeds swell and the flesh turns rubbery.
Below, I’ll walk you through the thumb-press test, seasonal timing tips, and how to avoid common mistakes that turn your harvest into a gamble. No more guessing—just foolproof, flavor-packed results.
The thumb-press test: how to check yellow summer squash ripeness
Harvesting yellow summer squash at the perfect moment transforms your garden bounty into tender, flavorful meals. The thumb-press test is my go-to method for determining ripeness—it combines visual cues with tactile feedback for foolproof results.
When you master this technique, you'll avoid the pitfalls of overripe squash (tough, seedy, and bitter) or underripe squash (watery and bland). Let's break down exactly how to use it.
First, focus on three key indicators: size, color, and skin texture. A ready-to-harvest squash will typically measure between 6-8 inches in length, with a deep, consistent yellow hue. The skin should look firm but not hard—this is where the thumb-press test comes into play.
If you're unsure about any of these visual clues, the tactile feedback from the thumb test will confirm ripeness every time.
How to Perform the Thumb-Press Test
- Select a squash that's 6-8 inches long with a deep yellow color and a yellow stem end.
- Press your thumbnail firmly but gently into the skin near the blossom end (the end opposite the stem).
- Look for a slight indentation that stays when you release pressure—this indicates tender skin.
- If the skin doesn't dent or feels rubbery, the squash needs more time on the vine.
- If the skin dents deeply or feels soft, the squash is overripe and past its prime.
Pro Tip: The perfect squash should yield slightly to pressure but still feel firm to the touch.
Let me share what I've learned about the ideal harvest window for yellow summer squash. Most varieties reach maturity between 45-55 days after planting, but this can vary based on your climate.
In my Zone 6a garden, I typically start seeing harvest-ready squash in early July, with peak production through August. The key is to check your plants every 2-3 days during this window—squash can go from perfect to overripe surprisingly fast!
Don't rely solely on the thumb-press test, though. Combine it with these additional visual cues for 100% accuracy:
- Look for a yellow stem end (green stems mean it's not ready)
- Check that the skin separates slightly when you gently scratch it with your fingernail
- Listen for a hollow sound when you tap the squash—it should sound slightly hollow but not empty
Weather plays a surprisingly big role in squash ripening. Hot, dry conditions can speed up maturation, while cool, cloudy weather may slow it down. In my experience, squash grown in 75-85°F temperatures tend to develop the best flavor and texture.
If you're in a particularly hot climate, you might need to harvest slightly earlier than the 6-8 inch mark to prevent overripeness. Always adjust your expectations based on your local growing conditions.
One of my biggest lessons came from a tough-skinned harvest a few years back. I ignored the thumb-press test and waited until my squash reached 9 inches long, thinking bigger meant better. The result? Rock-hard skin and massive seeds that made slicing a chore.
Now I harvest at 7 inches maximum—smaller but perfectly tender every time. This experience taught me that size isn't everything when it comes to yellow summer squash.
For gardeners new to the thumb-press test, I recommend practicing on a few squash before committing to a full harvest. Start with 3-5 squash per plant, testing them at different sizes to get a feel for the ideal texture.
Keep a small notebook nearby to jot down observations—you'll quickly develop an intuition for when your particular variety is at its peak. Remember, the goal is tender flesh with minimal seeds, not maximum size.
When you've confirmed ripeness using the thumb-press test and visual cues, it's time to harvest. Use a sharp knife or pruning shears to cut the squash from the vine, leaving about 1 inch of stem attached. This stem attachment helps preserve freshness during storage.
After harvesting, store your squash in a cool, dry place (like a pantry) for up to 2 weeks, or refrigerate for longer storage. The sooner you use freshly harvested squash, though, the better the flavor will be.
Mastering the thumb-press test has completely transformed my yellow summer squash harvests. What started as a guesswork process now yields perfectly tender, seed-free squash every time. The best part?
This method works for zucchini and other summer squash varieties too. Once you learn to read your plants, you'll never second-guess harvest time again. Happy gardening!
🍆
Common mistakes that ruin your yellow summer squash harvest
Harvesting yellow summer squash at the wrong time can turn your garden bounty into a tough, seedy disappointment. One of the biggest mistakes is waiting too long—once squash grow beyond 8 inches, their flesh becomes fibrous and packed with large seeds.
I’ve seen gardeners miss the perfect window by just a few days, ending up with squash that’s more like a baseball bat than a tender side dish.
Another common pitfall is overwatering, which dilutes flavor and makes squash waterlogged. While consistent moisture is key, soggy soil invites blossom-end rot and weakens plant health.
I learned this the hard way when my first summer squash harvest tasted bland—turns out, my "generous" watering schedule was actually drowning my plants.
Even subtle signs like bitterness or uneven coloring can ruin a harvest if ignored. These often signal stress from inconsistent care or poor soil conditions. The good news? Most of these mistakes are easy to fix once you know what to watch for.
⚠️ When to Harvest Yellow Summer Squash
Harvest when:
- Squash reaches 6-8 inches long
- Skin yields slightly to thumbnail pressure but doesn’t dent
- Stem snaps cleanly when bent (not pulled)
- Color is deep yellow with no green
✅ Pro Tip: Harvest in the morning for peak tenderness and flavor.
Over-maturity isn’t the only enemy—under-harvesting stresses plants too. When squash linger on the vine, they compete for nutrients, slowing new growth. I now check my plants every 2-3 days during peak season to avoid this.
A quick glance at the vine tells me when it’s time to grab my pruners.
Blossom-end rot, caused by calcium deficiency or uneven watering, can turn the bottom of your squash into a mushy mess. To prevent this, I mulch heavily and maintain even moisture. Adding crushed eggshells to the soil also boosts calcium levels naturally—a trick I picked up from fellow gardeners.
Finally, don’t ignore weather warnings. Hot, dry spells can concentrate flavors but also toughen squash faster. If a heatwave hits, harvest earlier than usual and store squash in a cool, dark place. I’ve saved many a harvest this way during our southern summers.