
Picking
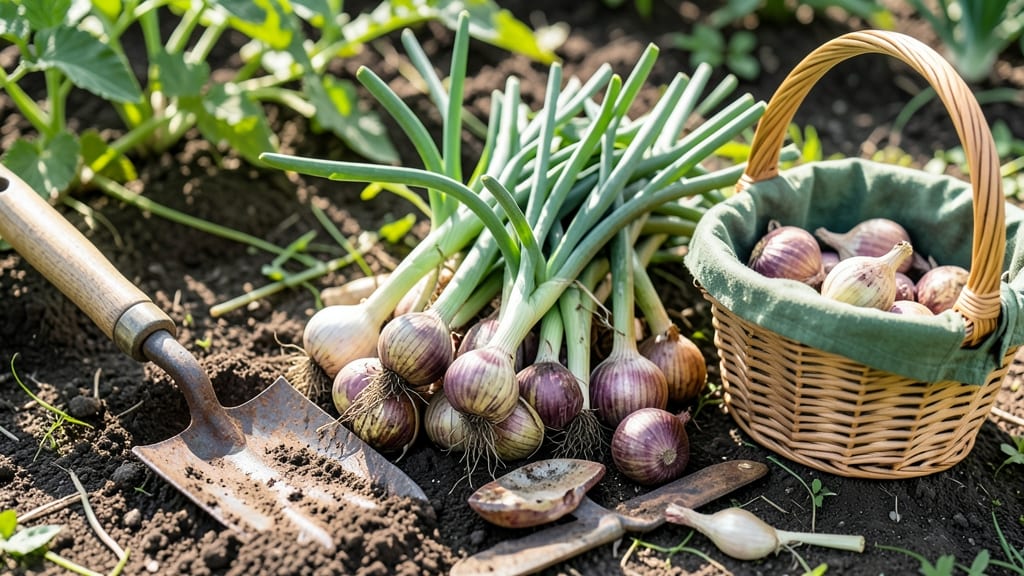
Harvesting shallots planted in spring at the right time ensures tender, flavorful bulbs 🧅—and missing that window can turn your crop into tough, bitter messes.
Knowing the exact moment to harvest your spring-planted shallots can mean the difference between a flavorful, tender bulb and a bitter, overgrown mess—yet many gardeners miss the window by weeks.
In USDA Zone 6a, where spring planting typically happens between March and April, the ideal harvest window falls between late summer and early fall—usually around August to October.
But timing isn’t just about the calendar; it’s about watching for key signs like yellowing foliage and firm, well-formed bulbs.
Below, I’ll break down the perfect harvest cues, climate-zone adjustments, and how to cure and store your shallots for maximum shelf life—so you never waste another harvest again.
Spring shallot harvest timing by USDA climate Zones: when to dig for peak flavor
Timing your spring-planted shallot harvest correctly ensures you get those sweet, tender bulbs at their flavor peak. The 3-4 week harvest window is critical—miss it, and your shallots risk splitting or developing that sharp, bitter taste we all hate.
Since growing seasons vary dramatically across USDA Zones 3-10, knowing your exact zone and adjusting for early/late springs will make all the difference.
Shallots planted in early spring (March-April) typically reach harvest readiness between 100-150 days after planting, but this timeline shifts based on your zone. In colder Zones 3-5, you might extend the season with row covers, while Zones 8-10 often face heat stress if harvested too late.
Let's break down the exact harvest windows by zone so you can plan accordingly.
Why timing matters: Harvest too early, and bulbs won't develop full flavor. Wait too long, and they'll split or become pungent. The key is watching for foliage yellowing while bulbs reach 1-2 inches in diameter—this is your sweet spot for perfect shallots.
If you planted your shallots in late spring (May), adjust your harvest window by adding 2-3 weeks to these estimates. For example, a Zone 6 gardener with late May planting should aim for harvest in mid-September instead of early August.
Always prioritize foliage color over calendar dates—yellowing tops mean it's time to dig, regardless of zone.
For northern gardeners (Zones 3-5), consider using black plastic mulch or straw mulch to warm the soil and accelerate growth. This can shave off 7-10 days from your harvest timeline.
Conversely, southern gardeners (Zones 8-10) should focus on shade cloth during peak summer to prevent bolting and ensure sweet bulbs.
Pro tip: Harvest in stages if your patch shows varying readiness. Pull the most mature shallots first (those with fully yellowed foliage), leaving less mature ones to finish. This extended harvest window gives you fresh shallots for weeks and prevents waste.
Store newly harvested bulbs in a cool, dry place for up to 2 weeks while you finish the crop.
Watch out for overripe shallots—they develop a sharp, almost garlicky bite when left too long. If you see split bulbs or mushy centers, you've missed the window. The good news?
Proper timing gives you tender, sweet shallots perfect for soups, salads, or storage. Mark your calendar now based on your zone, and you'll never miss harvest again!
Remember: Shallots are perennial, but spring-planted ones focus energy on bulb development. Next year, try fall planting for an even earlier harvest—just adjust your timing by 6-8 weeks later in the season. Happy digging!
5 Visual and physical signs your shallots are ready for harvest (before bulbs split)
Harvesting shallots at the perfect moment ensures the best flavor and texture, but many gardeners struggle to spot the exact signs. Unlike onions, shallots don't form a single bulb—they grow in clusters—and their readiness is signaled through subtle yet critical visual cues.
The key is watching for foliage changes, bulb firmness, and skin texture before the tops flop over completely. Missing this window can lead to split bulbs or overly pungent flavors, so let's break down the 5 must-know indicators that your spring-planted shallots are ready for harvest.
First, pay attention to the color of the leaves. When your shallots are ready, the green foliage will start turning yellow-brown from the bottom up, similar to how garlic signals harvest time.
This discoloration spreads upward over 7–10 days, but if the entire plant turns yellow at once, you’ve waited too long. The ideal time to harvest is when about 50% of the leaves have yellowed—this means the bulbs are fully developed but haven’t yet started to split.
Waiting longer risks losing those tender, sweet flavors you’ve nurtured all season.
Next, check the bulb size and firmness by gently brushing away the soil. Ready-to-harvest shallots will have bulbs that are 1–2 inches in diameter and feel firm to the touch, like a ripe potato. If you press lightly and the bulb gives slightly, it’s still maturing.
Overripe shallots, on the other hand, become soft and may even start to split at the neck, ruining their storage potential. Pro tip: Dig up one bulb from the outer edges of your patch to test—this minimizes damage to your main crop while giving you a clear signal.
Now, let’s talk about the skin texture, which is often overlooked but crucial. Perfectly timed shallots will have a dry, papery skin that peels back easily. If the skin is still shiny or moist, the bulbs aren’t ready yet.
Conversely, if the skin looks brittle or cracked, you’ve missed the boat. This dryness is nature’s way of telling you the bulbs have reached their sugar peak and are primed for harvest.
Think of it like the wrinkled skin of a ripe pear—it’s a clear visual cue that the flavor is at its best.
When to Harvest Spring-Planted Shallots
Signs Your Shallots Are Ready
- 🟡 50% yellowed leaves
- ✅ 1–2" firm bulbs
- 📏 Dry, papery skin
- 🌡️ Warm soil temps (70°F+)
- 🌱 Tops begin to flop
Risks of Overripe Shallots
- 🔥 Split bulbs
- 🤒 Bitter flavor
- 💧 Soft, mushy texture
- 🌧️ Poor storage life
- 🌿 All leaves yellow
Pro Tip: Harvest on a dry, sunny morning to allow bulbs to cure properly before storage.
The top growth pattern is another critical clue. When shallots are ready, the tops will start to flop or collapse, almost like they’re bowing to say, “I’m done!” This happens because the plant is redirecting energy from the leaves to the bulbs.
If you see this, act quickly—within 24–48 hours, the bulbs may begin to split. One trick I use is to mark a few plants when the tops first flop, then check them daily. This gives you a clear timeline for the rest of your crop.
Ignoring this sign is a common mistake, especially for first-time growers who wait until the tops are completely brown and crispy.
Finally, consider the soil and weather conditions when deciding to harvest. Shallots thrive in warm soil temperatures (70°F or higher), which signals they’re ready to pull energy from the soil. If your region experiences early fall rains or cooler nights, the bulbs may mature faster.
In these cases, harvest as soon as you see the first signs of yellowing, even if the bulbs aren’t at their maximum size. Conversely, in hot, dry climates, the bulbs may take longer to reach harvest readiness—so don’t rush the process.
Always prioritize the visual cues over the calendar, as local microclimates can shift harvest timing by weeks.
By mastering these 5 visual and physical signs, you’ll never again miss the perfect moment to harvest your spring-planted shallots. The reward? Bulbs that are tender, sweet, and store beautifully for months to come.
Next time you’re in your garden, take a moment to kneel down and inspect your shallots—your taste buds will thank you! 🧅