
How To
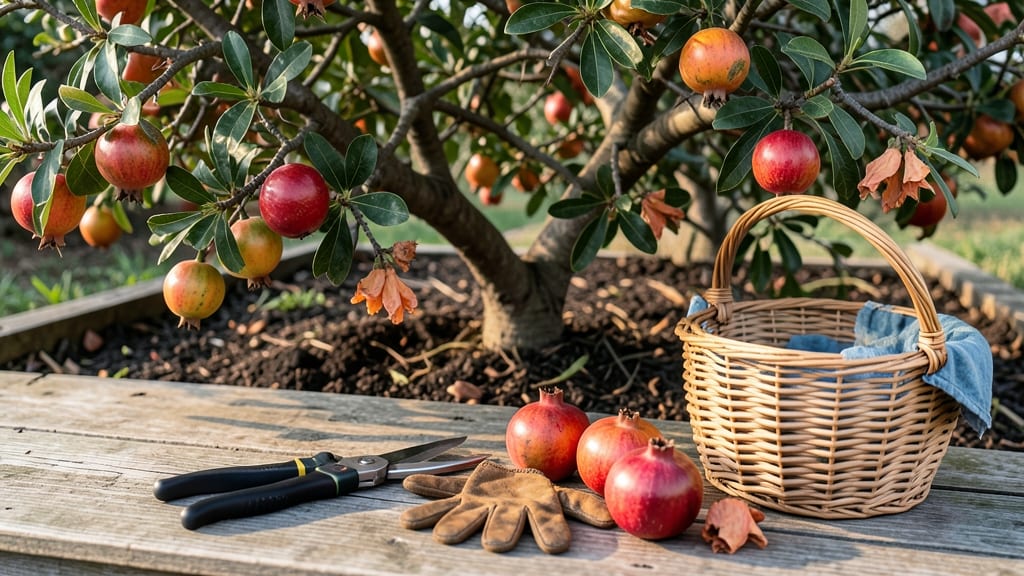
Harvesting pomegranate fruit at the right time means the difference between tart, mealy seeds and sweet, jewel-like bursts of flavor 🍇—and the key is knowing when the seeds turn deep red and the skin cracks just enough to tell you it’s ready.
Picture this: you’ve waited months for your pomegranate to ripen, only to pick it too early and end up with a fruit that’s still sour or too hard. Or worse, you wait too long, and the birds or pests get to it first.
The good news? There’s a foolproof way to check ripeness using just your eyes and fingers—no guesswork required.
In this guide, I’ll walk you through the exact visual cues to look for—like seed color shifts from white to ruby red and the telltale skin cracks at the top—plus how climate and region affect your harvest window.
Whether you’re in USDA Zone 7 or further south, you’ll know precisely when to reach for those pruning shears.
By the end, you’ll confidently harvest your pomegranates at peak sweetness, store them properly, and even troubleshoot common mistakes that turn a great crop into a disappointment. Let’s get started.
How to tell when pomegranates are ripe by seed color & skin changes
Picking pomegranates at the perfect moment transforms your harvest from tart disappointment to bursting sweetness. Unlike many fruits, pomegranates don't soften as they ripen—instead, their seed color and skin texture reveal their true readiness.
I’ve learned the hard way that waiting for the hull to split isn’t enough; you need to check three key signals simultaneously for foolproof results.
The most reliable indicator is the seed color transformation. Inside the leathery skin, seeds start as pale white, then turn pink, and finally deepen to ruby red at peak ripeness.
This color shift happens gradually over 4-6 weeks before harvest, so patience pays off. Don’t be fooled by surface color alone—the skin might look ripe while the seeds remain underdeveloped.
Here’s where many gardeners go wrong: they assume a cracked hull means it’s time to pick. While slight splitting at the top is normal, a fully open fruit signals overripeness and potential rot.
Instead, look for a 1/4-inch natural fissure—this tiny gap is your green light to harvest before pests or birds beat you to it.
Weight also plays a crucial role. A ripe pomegranate feels heavy for its size, almost like it’s too dense to hold comfortably. Gently press the fruit—it should yield slightly but feel firm, not mushy.
If it feels light or hollow when shaken, it’s still developing. This weight test works even when the skin color is misleading.
| Ripeness Stage | Seed Color | Skin Condition | Harvest Ready? |
|---|---|---|---|
| Early Development | Pale white | Green, firm, no cracks | ❌ Not ready |
| Mid-Ripening | Pinkish-white | Turning reddish, slight firmness | ⚠️ Wait 1-2 weeks |
| Peak Ripeness | Deep ruby red | Leathery, slight top crack (1/4") | ✅ Harvest now! |
| Overripe | Dark red (seeds may shrivel) | Soft, open hull, wrinkled skin | ❌ Too late |
🍇 Pro Tip: Cut open a test fruit if unsure—ripe seeds should pop when bitten!
Regional climate affects ripeness timing too. In USDA Zones 8-11, pomegranates typically ripen by late September to October, while Zone 7 gardeners might wait until November. Early frosts can trick the tree into dropping fruit prematurely, so monitor weather forecasts.
I once lost an entire harvest to an unexpected 28°F night—now I cover my trees when frost is predicted.
Don’t ignore the stem changes either. As the fruit matures, the stem near the fruit darkens and dries out. This is nature’s way of signaling it’s time to separate.
If the stem snaps cleanly when twisted, that’s another green light. However, if it pulls away with resistance, the fruit likely needs more time on the tree.
For commercial growers, timing is everything. Harvesting too early means sour, astringent seeds, while waiting too long risks bird damage or cracked fruit. I recommend harvesting in cool morning hours to preserve quality.
Use a pruning saw for larger trees and a harvesting bag to prevent bruising—these tools make all the difference in post-harvest shelf life.
One final trick: tap the fruit gently with your knuckles. A ripe pomegranate produces a deep, hollow sound, while an unripe one sounds dull. This acoustic test works surprisingly well, especially when combined with the other methods.
I’ve used it for years to spot the ripest fruits in my orchard without cutting anything open.
Remember, pomegranates won’t ripen further once picked, so harvest at peak for the best flavor. Store them in a cool, dry place (50-60°F) for up to 3 months, but enjoy them fresh as soon as possible.
The first bite of a perfectly ripe pomegranate—juicy, sweet, and seed-perfect—is worth every minute of waiting.
Best harvesting techniques to preserve pomegranate quality & flavor
Once you’ve spotted the perfect deep red pomegranate with that telltale crack at the top, the next steps determine whether your harvest stays fresh and flavorful or spoils within days 🍇. The way you cut, handle, and store pomegranates directly impacts their shelf life and taste.
A wrong move—like bruising the skin or exposing seeds to air—can turn your sweet harvest into a mushy mess.
I’ve learned the hard way that rushing the harvest process leads to premature spoilage. For example, twisting a pomegranate off its stem can crack the skin internally, while using dull shears leaves jagged edges that rot faster.
The key is gentle precision—whether you’re harvesting for fresh eating, juicing, or long-term storage. Let’s break down the exact steps to preserve that jewel-like quality until your last seed.
Step-by-Step Harvesting Guide
-
Step 1: Gather Tools
Pruning shears (clean, sharp), bucket with soft padding, plastic gloves, and a cutting board. -
Step 2: Cut, Don’t Twist
Use shears to cut the stem 1-2 inches above the fruit—never pull or twist, which bruises the skin. -
Step 3: Handle with Care
Place pomegranates in a padded bucket to avoid skin damage. Wear gloves to protect from tannin stains. -
Step 4: Test for Ripeness
Gently press the skin—it should feel firm but slightly yielding, like a ripe avocado. -
Step 5: Store Immediately
Keep at 45-50°F (7-10°C) in a humidity-controlled space (e.g., unheated garage).
After harvesting, the first 24 hours are critical for preventing rot. I always store my pomegranates in a paper bag (not plastic) to allow airflow while keeping humidity stable. This mimics their natural environment and slows down moisture loss.
For longer storage, consider curing them—place them in a cool, dark spot for 3-5 days to toughen the skin, which extends shelf life by up to 3 weeks.
If you’re not ready to eat them all at once, freezing the arils (seeds) is a game-changer. Simply crack open the pomegranate, separate the seeds from the white pith, and freeze them in an ice cube tray with water.
These frozen arils keep their flavor for up to 6 months—perfect for smoothies or garnishes when fresh pomegranates aren’t in season.
One mistake I made early on was storing pomegranates in the fridge without prep. The cold air causes condensation on the skin, leading to mold within days.
Instead, let them acclimate to room temperature for 1-2 hours before refrigerating. This small step can add 1-2 extra weeks to their freshness.
For gardeners in warmer climates (USDA Zones 9-11), pomegranates often ripen earlier and may need shade cloth to prevent sunburn.
If you’re in a cooler zone (Zone 7-8), harvest just before the first frost—even if the fruit isn’t fully ripe, it’ll finish ripening indoors at room temperature over 1-2 weeks.