
How To
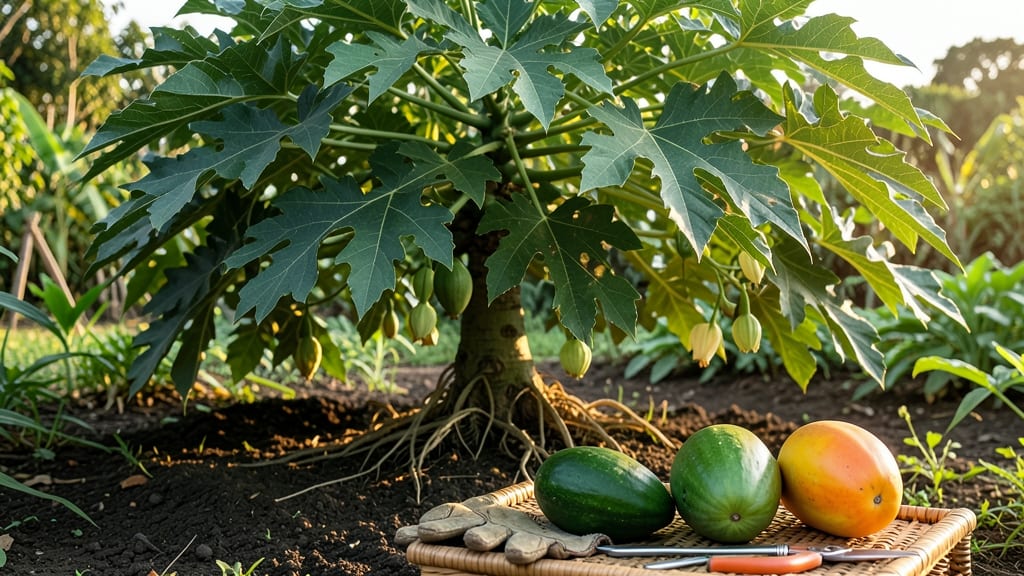
Harvesting papaya at the right time means the difference between a fruit that’s bursting with sweetness and one that’s mealy or underripe. The key is watching for the perfect color shift—from green to golden yellow or deep orange—paired with subtle texture cues.
Picking too early means bland, seedy fruit, while waiting too long risks a mushy mess. But mastering these three color-stage tricks will help you nail the harvest window every time, whether you’re growing 🍈 Solo or Maradol varieties.
Climate plays a role too—tropical zones speed up ripening, while cooler areas may need extra weeks. I’ll break down the exact visual and touch tests to use, plus regional adjustments so your papayas reach peak flavor.
Ready to turn your harvest into a sweet, juicy success? Let’s dive into the signs that tell you it’s time to pick—and how to ripen the rest at home.
Papaya ripeness stages by color: the 3 key visual clues
Harvesting a papaya at the right moment transforms it from a bland, seedy disappointment into a juicy, sweet masterpiece. The skin color is your primary guide, but each hue reveals critical clues about flavor, texture, and seed development.
Let’s break down the three essential ripeness stages and what they mean for your harvest.
First, green papayas are the most common sight on the tree, but they’re far from ready. This stage signals immature fruit with hard flesh, minimal sweetness, and bitter, seedy centers. Many gardeners mistake this phase for ripeness, but patience pays off—wait for the color shift before harvesting.
The transition to yellow or orange skin is your golden ticket to success. This stage indicates the peak of sweetness and tenderness, with seeds turning from black to deep brown.
The skin may also develop soft spots when gently pressed, a key indicator of ripeness. Timing here ensures a perfect balance of flavor and texture.
Here’s a quick visual reference to help you spot the ideal harvest window:
| Stage | Skin Color | Texture | Flavor | Seed Color | Harvest Ready? |
|---|---|---|---|---|---|
| Unripe | Green | Hard | Bland, bitter | Black | ❌ No |
| Ripening | Yellow/Orange | Slightly soft | Sweet, mild | Brown | ✅ Yes |
| Overripe | Deep orange/red | Mushy | Very sweet, grainy | Dark brown | ❌ No |
For yellow-skinned varieties like Solo or SunUp, aim for a uniform golden hue with no green patches.
These types ripen faster and may soften more quickly, so act promptly once you spot the color change. Orange or red varieties, such as Maradol, develop a deeper hue and can stay firm slightly longer.
Don’t overlook the stem’s condition—a dry, brown base signals ripeness, while a green stem means the fruit needs more time. Twist the papaya gently at the stem; if it detaches easily, it’s ready. Ignoring this cue often leads to premature harvesting, leaving you with underripe fruit.
Pro tip: Harvest in the morning when temperatures are cooler. This preserves the fruit’s firmness and prevents overripening during transport. Store unripe papayas at room temperature to speed up ripening, or refrigerate ripe ones to slow it down.
If you miss the window and your papaya turns deep orange with soft spots, it’s overripe but still edible. Blend it into smoothies or sauces to salvage the sweetness. The key is acting at the right moment—when the skin yields slightly and the color is fully vibrant.
Practice makes perfect, so keep a harvest journal to track your papaya’s ripening progress. Note the days from flowering to color change, and adjust your timing for future crops. With
How to test papaya ripeness beyond color: touch, smell, and seed tricks
Color alone isn’t always enough to judge a papaya’s ripeness—especially when dealing with hybrid varieties or inconsistent sunlight. To avoid underripe (bland) or overripe (mushy) fruit, I rely on three foolproof tests: gentle pressure, aroma cues, and seed color.
These tricks work even when the fruit’s exterior looks deceptive.
Start with the pressure test, my go-to method. A perfectly ripe papaya yields slightly when pressed near the fruit’s blossom end—think of the give of a ripe avocado.
If it’s rock-hard, it’s not ready; if it feels mushy, it’s past its prime. This test works best when combined with visual cues, like full color change from green to yellow/orange.
- ✅ Pressure Test: Confirms ripeness without cutting fruit
- ✅ Smell Check: Sweet, tropical aroma = ready to eat
- ✅ Seed Color: Black seeds mean peak flavor
- ❌ Overripe Risk: Ignoring mushy texture leads to waste
- ❌ False Smells: Some varieties smell ripe before they are
- ❌ Seed Confusion: White seeds = underripe, but some hybrids vary
Next, trust your nose—the aroma test is surprisingly reliable. A ripe papaya emits a sweet, tropical scent near the stem. If it smells faint or sour, it’s not ready. Pro tip: Smell the blossom end first, as this is where the most concentrated aroma develops.
Some heat-stressed papayas may smell ripe prematurely, so always cross-check with the pressure test.
For the ultimate verification, crack open a small section of the papaya to check the seed color. Fully ripe papayas have black seeds surrounded by bright orange flesh. If the seeds are white or pale yellow, the fruit needs more time on the tree.
This method is my favorite for Maradol varieties, which often ripen unevenly.
Common mistakes? Harvesting when the fruit is still green with color patches or waiting until it’s too soft. I’ve learned the hard way that overripe papayas turn mushy within 24 hours, while underripe ones lack sweetness.
To extend shelf life, harvest at the first sign of ripeness and store at room temperature until fully colored.
Master these three tests, and you’ll never miss the sweetest, most flavorful papaya again. Pair them with the color cues from the previous section, and you’ll have a foolproof system for perfect harvests every time. Happy harvesting! 🌱