
How To
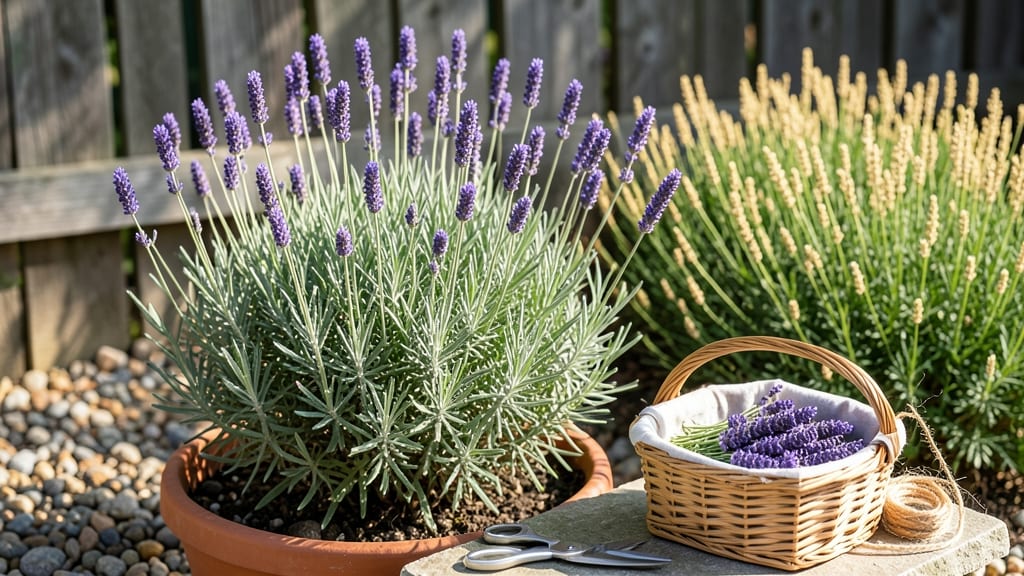
Harvest lavender for drying when buds are fully formed but before they bloom—this mid-summer window in July or August is where the magic happens for the richest oil and deepest purple hues.
Picture this: you’ve nurtured your 🌿 lavender all season, and now the stakes are high. One wrong cut, and you’ll end up with pale, fragrantless stems. But nail the timing, and you’ll unlock bundles that perfume your home for months.
Why does this matter? Because lavender’s essential oil peaks right before blooming—when the buds are dense and woody, not soft or green. Skip this stage, and you’ll miss the most aromatic harvest of the year.
Below, I’ll walk you through the exact visual cues to spot, the best time of day to harvest, and how to dry your lavender for maximum fragrance—plus the three mistakes that ruin even the best harvest.
The exact stage to harvest lavender for maximum oil and color
Timing your lavender harvest is the secret to unlocking its peak essential oil content and those vibrant purple hues that make dried lavender so coveted. The ideal moment arrives when buds are fully formed but still closed, typically 2-4 weeks before full bloom.
This precise window ensures you capture the highest concentration of aromatic compounds while preserving the rich color that fades if left too long on the plant.
Why does this matter? Harvesting too early means underdeveloped buds with weak fragrance, while waiting too long results in open flowers that scatter seeds and lose their deep color.
The bud stage is where lavender’s magic happens—when its chemical composition is at its most potent for both drying and oil extraction. Think of it like catching a wave: timing is everything.
Here’s the visual cue you’ve been waiting for: look for dense, woody buds that feel firm to the touch but haven’t yet unfurled. The stems should be thick and sturdy, not green and flexible.
Color-wise, aim for deep purple or lavender hues—anything paler means the plant isn’t ready. Pro tip: Pinch open a bud—if it resists and feels plump, it’s harvest-ready.
| Harvest Stage | Key Characteristics | Essential Oil Content | Color Preservation |
|---|---|---|---|
| Too Early (Green Buds) | Soft, green buds; stems flexible | Low (underdeveloped) | Poor (pale, weak) |
| Perfect Stage (Bud Stage) | Dense, woody buds; firm stems; deep purple | Highest (peak aroma) | Excellent (vibrant) |
| Too Late (Open Flowers) | Blooms unfurled; stems woody but flowers scattered | Moderate (oil disperses) | Fair (color fades) |
Let’s talk about lavender varieties because not all types reach their harvest window at the same time. English lavender and French lavender typically hit their peak in mid-to-late summer, while Spanish lavender may bloom slightly earlier.
Pay attention to your specific variety’s growth cycle—some can be ready as early as June, while others might not be until August. If you’re unsure, observe a few plants: the first to show fully formed buds is your signal to start harvesting.
Age matters too. First-year lavender plants often produce smaller buds with lower oil content, so focus on harvesting from well-established plants (2+ years old). These mature plants have developed stronger stems and a higher concentration of aromatic compounds.
Think of them as the veterans of your garden—ready to deliver the goods when the time is right. For container-grown lavender, the same rules apply, but be extra gentle to avoid damaging roots.
One common mistake I see is harvesting lavender after a heavy rain or when the plants are still dewy in the morning. Moisture dilutes essential oils and can cause mold during drying.
Always harvest on a dry, sunny morning when dew has evaporated but the sun hasn’t yet peaked—this preserves both fragrance and color. If you must harvest later in the day, do it in the early afternoon to avoid wilting.
Here’s a pro move: Harvest in stages rather than all at once. By cutting one-third of the stems at a time, you encourage the plant to produce more buds for future harvests. This method also prevents overstressing your lavender, which can lead to stunted growth or death.
Use clean, sharp pruners and cut just above a leaf node or side shoot to promote bushier growth. Avoid tearing stems—this bruises the plant and reduces oil quality.
Once you’ve mastered the bud stage, you’ll notice a dramatic difference in your dried lavender. The bundles will retain their deep purple color for months, and the scent will be richer and longer-lasting than store-bought varieties.
Plus, you’ll have the satisfaction of knowing you’ve timed it perfectly—like a gardener’s version of a Michelin-starred dish. The key is patience and observation: your lavender will tell you when it’s ready if you know what to look for.
Ready to put this into action? Grab your pruners and head to the garden—your peak harvest window won’t last forever! The moment those buds turn from green to purple is your cue to strike. Happy harvesting! 🌿✂️💜
Step-by-step harvesting techniques for perfect dried lavender
Now that you’ve identified the perfect harvest stage, it’s time to cut your lavender with precision to lock in that rich fragrance and vibrant color.
The way you harvest directly impacts how well your lavender dries—so grab your tools and let’s dive into the step-by-step process that turns fresh stems into fragrant bundles.
First, you’ll need just a few essential tools: sharp pruning shears (or clean scissors), a bucket or basket, and rubber bands or twine for bundling. Avoid dull blades—they crush stems and damage essential oil glands, ruining your harvest’s potency.
Pro tip: Harvest on a dry, sunny morning after morning dew has evaporated to prevent mold.
Step-by-Step Harvesting Guide
-
Step 1: Cut at the Base
Use your pruning shears to cut stems at a 45-degree angle, about 2-3 inches below the wooden base. This encourages new growth and prevents disease. -
Step 2: Harvest in Clusters
Cut 3-4 stems at once in tight clusters. Avoid harvesting single stems—they dry poorly and lose fragrance faster. -
Step 3: Bundle Immediately
Gather stems into small 5-6 stem bundles and secure with rubber bands or twine. This keeps stems upright during drying. -
Step 4: Hang Upside Down
Suspend bundles in a well-ventilated, dry space (like a garage or shed) with 1-2 inches between bundles to allow air circulation. -
Step 5: Dry for 2-3 Weeks
Lavender needs 2-3 weeks to dry completely. Test by rubbing a bud—if it crumbles easily, it’s ready!
One of the most common mistakes is harvesting too late—when buds open fully. This reduces essential oil content and turns your lavender into a pale, fragrant shadow of its former self.
Another pitfall? Overcrowding bundles during drying, which traps moisture and leads to mold. Always space them out for airflow.
Once dried, your lavender should retain its deep purple hue and release a rich, floral scent when crushed. Store bundles in a cool, dark place (like a glass jar) to preserve their fragrance for up to a year.
Now, imagine walking into your home and being greeted by that signature lavender aroma—all thanks to precise harvesting!
For extra tips, watch for woody stems and dense buds—these are your green lights. And remember, the earlier you harvest in the season, the more fragrant oil your lavender will yield. Happy harvesting! 🌿✂️