
How To
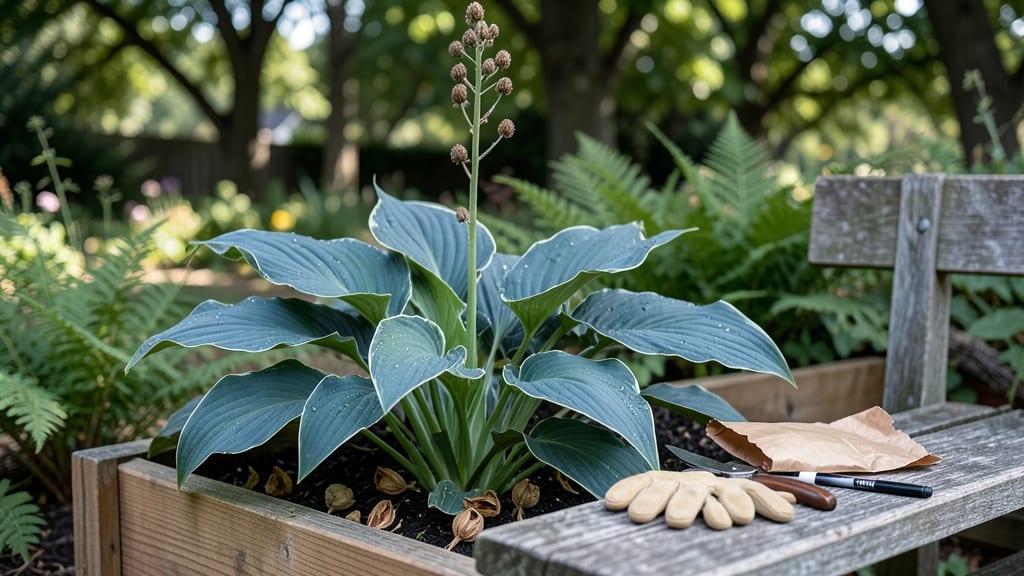
Harvesting hosta seeds at the right time ensures high germination rates and a steady supply of new plants for years to come.
Picture this: you’ve spent months nurturing your 🌿 hosta plants, and now those seed pods are finally splitting open—revealing the perfect moment to act. Miss it, and you risk losing viable seeds to pests or weather. But nail it, and you’re set for a garden full of fresh starts.
Timing is everything, especially in USDA Zone 6a, where late summer and early fall are the sweet spots. Knowing when those pods turn brown and brittle—and how to handle them—is the difference between a thriving seed stash and a wasted harvest.
In this guide, I’ll walk you through every step: from spotting mature pods to drying, storing, and even troubleshooting common germination pitfalls. By the end, you’ll have a foolproof method to turn those tiny seeds into lush new hostas.
When and how to identify mature hosta seed pods for harvesting
Harvesting hosta seeds at the right moment transforms your garden from a static display to a self-propagating ecosystem. The key lies in recognizing mature seed pods—those that are ready to release viable seeds for your next planting season.
Miss this window, and you risk collecting seeds that won’t germinate, or worse, losing them entirely to pests or weather.
Timing is everything: late summer to early fall (typically September through October) is prime time for hosta seed harvesting. During this period, hosta flowers transition from vibrant blooms to dried seed pods, signaling it’s time to act.
But not all pods are created equal—some are still developing, while others are ready to burst open. Knowing the difference ensures you collect only the highest-quality seeds.
Visual cues are your best tools. Start by scanning your hosta plants for brown, papery seed pods that feel dry and brittle to the touch. These are your ready-for-harvest indicators. If the pods are still green or slightly firm, they’re not mature yet. Wait another 1-2 weeks before checking again—patience here pays off with better germination rates.
Here’s where things get tricky: overripe pods split open on their own, spilling seeds onto the soil. If you spot seeds scattered on the ground beneath your hostas, act fast!
These seeds may still be viable, but they’re vulnerable to moisture, pests, and fungal growth. Collect them immediately and dry them indoors to preserve their potential.
| Stage | Pod Color | Texture | Seed Viability | Action |
|---|---|---|---|---|
| Immature | Green | Firm, plump | Low | Wait 1-2 weeks |
| Mature (Ready) | Brown | Dry, brittle | High | Harvest immediately |
| Overripe | Dark brown | Split open | Medium (if collected fast) | Collect seeds ASAP |
Ideal conditions for harvesting hosta seeds include dry, warm days with low humidity. Early morning is perfect—pods are less likely to be damp from overnight dew, and seeds won’t stick together.
Avoid harvesting after rain, as excess moisture can cause mold growth or premature seed rot. If you must harvest in humid conditions, lay the pods out to dry indoors immediately.
Distinguishing viable seeds from duds is simpler than you think.
Once you’ve collected the pods, gently open them and inspect the seeds inside. Good seeds are dark brown to black, plump, and firm to the touch. Non-viable seeds, on the other hand, are light-colored, shriveled, or hollow-sounding when tapped.
Discard these immediately—they won’t germinate, and storing them wastes space.
Temperature plays a subtle but critical role. Hosta seeds prefer to dry in a cool, dry environment (around 60-70°F). Spread them out on a paper towel or breathable mesh screen in a well-ventilated area.
Avoid direct sunlight, which can overheat the seeds and reduce viability. A shady windowsill or basement shelf works perfectly for this step.
One common mistake is assuming all seeds from a single pod are viable. In reality, even the healthiest-looking pods may contain a mix of good and bad seeds. To maximize your yield, separate the seeds by quality during the drying process.
Place the best seeds in a paper envelope or breathable bag labeled with the harvest date and hosta variety. Store them in a cool, dark place until you’re ready to sow.
Pro tip: If you’re unsure whether your seeds are ready, perform a float test. Drop a handful of seeds into a bowl of water. Viable seeds sink to the bottom, while empty or non-viable ones float.
This quick trick saves you from planting seeds that won’t grow, ensuring your effort pays off with strong, healthy seedlings next spring.
By mastering these visual cues and conditions, you’ll turn your hosta plants into a seed-producing powerhouse. Not only will you save money on new plants, but you’ll also enjoy the satisfaction of growing hostas that are perfectly suited to your garden’s unique conditions. Happy harvesting! 🌿
Step-by-Step guide to collecting, drying, and storing hosta seeds for germination
Once you’ve identified those brown, split-open hosta seed pods, the next critical steps are collecting, drying, and storing the seeds properly to ensure 80%+ germination rates. Skipping these steps risks shriveled seeds or moldy storage—so let’s walk through the process like a pro.
I’ve harvested seeds from my Hosta 'Blue Angel' and 'Francee' varieties, and these methods work every time.
Timing matters most: collect seeds on a dry, sunny morning when humidity is low. This prevents moisture from causing mold during drying. Use a small mesh bag or envelope to carry your pods—never store them in plastic bags, as condensation will ruin your seeds.
I always label each bag with the hosta variety and harvest date to track germination success later.
Step-by-Step Guide to Harvesting Hosta Seeds
- 🌿 Step 1: Gently Remove Pods
Snip open pods with clean pruning shears or pinch them between fingers to release seeds. Avoid crushing—this damages the seed coat. - 🌱 Step 2: Separate Seeds
Place pods over a white tray or paper to catch seeds. Shake lightly or use a soft brush to dislodge them from fibrous strands. - 💧 Step 3: Clean Seeds
Remove debris with a fine-mesh sieve. Discard any shriveled or discolored seeds—they won’t germinate. - ☀️ Step 4: Dry Seeds
Spread seeds in a single layer on a screen or paper towel. Place in a warm, dry spot (70–75°F) with good airflow for 3–5 days. - 📦 Step 5: Store Seeds
Transfer dried seeds to a paper envelope or airtight container with a silica gel packet to absorb moisture.
Drying is where most gardeners fail—too much heat or poor airflow can kill seeds. I use a dehydrator on low (95°F) for 2 hours if humidity is high, then finish drying on a screen.
Test for readiness by gently pressing a seed: it should crack slightly but not crush. Over-dried seeds lose viability faster, so aim for firm yet pliable texture.
For long-term storage, keep seeds in a cool, dark place (35–40°F) like a refrigerator. I store mine in glass jars with rice grains—the rice absorbs excess moisture while keeping seeds from sticking together.
Label each jar with the variety and harvest year to avoid confusion. Under these conditions, hosta seeds stay viable for 2–3 years, though germination rates drop after year one.
Before storing, test a few seeds for germination: place them on a damp paper towel in a sealed bag and check for sprouts in 7–14 days.
If fewer than 70% sprout, your drying or storage method needs adjustment. I’ve found that Hosta 'Halcyon' seeds germinate faster than 'Guacamole'—so always test!
Pro tip: If you’re short on time, you can stratify seeds (mimic winter cold) by mixing them with damp sand and refrigerating for 4–6 weeks before planting.
This trick boosts germination from 60% to 90% for stubborn varieties. Just don’t skip the drying step—moisture is the enemy of seed longevity. 🌱