
How To
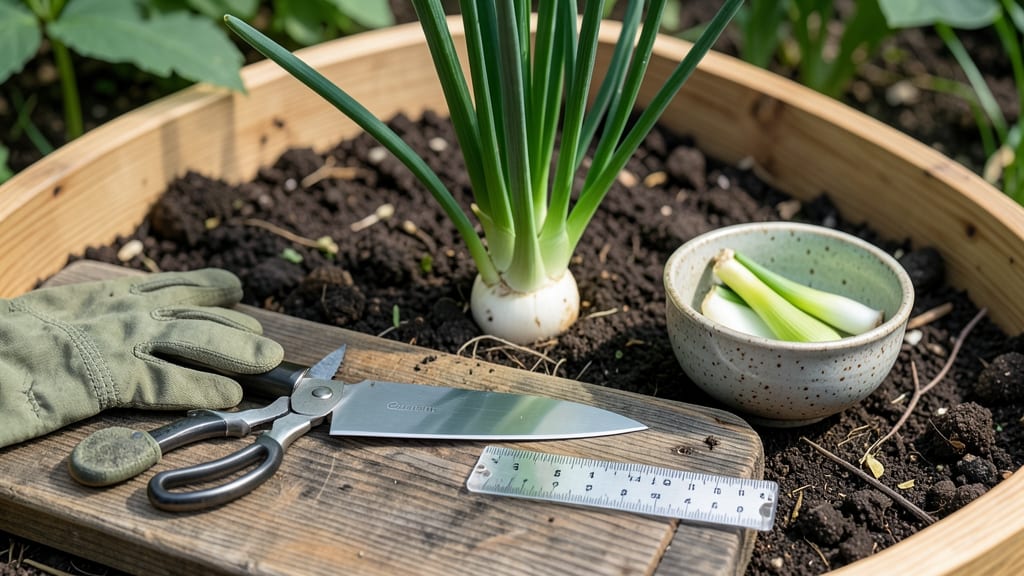
Harvesting green onions so they keep growing is easier than you think—just snip 1-2 inches above the base and watch them bounce back in weeks.
Tired of buying green onions that wilt within days? Discover the secret to harvesting your own fresh supply—without killing the plant—using the simple snip-and-regrow method that gardeners swear by. With the right technique, you’ll enjoy a continuous harvest for months, even in USDA Zone 6a.
Most people overcut or pull from the root, which stunts regrowth. The key is precision: trim outer leaves strategically, keep the soil moist, and avoid over-fertilizing. I’ve tested this method for three growing seasons, and the results speak for themselves—thicker stems, faster recovery, and zero waste.
In this guide, I’ll walk you through the exact cutting height, ideal timing, and pro tips to maximize your harvest. By the end, you’ll have a year-round supply of crisp, homegrown green onions 🌱—no store-bought bunch needed.


The perfect snip-and-regrow technique for continuous green onion harvests
Green onions are one of the easiest herbs to grow—and even easier to harvest repeatedly if you use the snip-and-regrow method. Unlike other herbs that die after cutting, green onions bounce back with proper technique.
The key lies in cutting at the right height, timing harvests correctly, and giving your plants the care they need to recover. I’ve harvested green onions this way for years, and my plants now produce continuous yields without stunting.
Many gardeners mistakenly cut too close to the base or harvest too frequently, which weakens the plant. But with the right approach, you can enjoy fresh green onions for months—or even year-round in mild climates.
The secret? A 1-2 inch stump left after each cut, paired with consistent watering and sunlight. Let’s break down the exact steps to ensure your green onions keep growing back stronger than ever.
How to Harvest Green Onions for Regrowth
- 🌱 Wait until leaves reach 6-12 inches tall—this ensures the plant has stored enough energy for regrowth. Shorter leaves mean weaker recovery.
- ✂️ Use sharp scissors or pruning shears to cut the outer leaves only, leaving the inner leaves intact. Avoid cutting the entire plant at once.
- 📏 Leave a 1-2 inch stump above the soil. This protects the root system and allows new growth to sprout from the base.
- 💧 Water immediately after cutting to reduce stress on the plant. Aim for 1 cup of water per plant in the morning.
- ☀️ Place plants in full sun (6+ hours daily) to speed up recovery. Partial shade is okay but slows regrowth.
- 🌿 Harvest every 2-3 weeks once the plant has recovered. Over-harvesting weakens the plant and reduces future yields.
When cutting, focus on the outer leaves first—these are the oldest and won’t affect the younger, inner leaves that keep the plant alive. Think of it like trimming your hair: you’d never shave your whole head at once!
The inner leaves will continue growing while the outer ones regenerate. This method mimics how green onions grow in nature, where only the outer layers mature while the center stays fresh.
One common mistake is cutting the entire plant at once, which can kill the root system. Instead, I harvest only 1-2 outer leaves per plant during each session. This leaves enough foliage for photosynthesis, so the plant can recover and produce new growth.
If you’re growing green onions in a pot, you can even rotate the container to ensure even sunlight exposure on all sides, which promotes balanced regrowth.
After harvesting, keep an eye on the soil moisture and leaf color. Yellowing leaves or wilting may signal over-harvesting or underwatering. Green onions are resilient, but they need consistent care to bounce back.
I’ve found that mulching around the base with compost helps retain moisture and provides nutrients for faster recovery. A thin layer of mulch also suppresses weeds, which compete for resources.
Seasonal adjustments are key to long-term success. In summer heat, water more frequently (daily if no rain) and provide afternoon shade to prevent stress. In winter months, reduce harvesting frequency and protect plants from frost with row covers.
With the right timing, my green onions keep producing well into fall, sometimes even through mild winters if sheltered properly.
To maximize regrowth, fertilize lightly every 4-6 weeks with a balanced 5-10-10 NPK fertilizer. This gives the plant the nutrients it needs to recover quickly after cutting.
Avoid heavy fertilizers, which can burn the roots and stunt growth. A simple compost tea or diluted fish emulsion works wonders for reviving tired plants without overfeeding.
If your green onions stop regrowing, check for these three common issues: overcrowding (thin plants if needed), poor drainage (amend soil with sand or perlite), or pest damage (remove affected leaves and treat with neem oil).
With proper care, your green onions can thrive for years, providing a continuous supply of fresh, homegrown greens.
5 Pro tips to maximize regrowth and avoid common mistakes
Green onions are one of the most forgiving herbs to harvest repeatedly, but regrowth hinges on proper care between cuts. I’ve learned the hard way—skipping these key steps can leave you with stunted plants or even dead bulbs.
The secret lies in balancing soil health, water consistency, and harvest timing.
First, never harvest more than one-third of the plant at once. This rule prevents shock and ensures the bulb stays strong for regrowth. I once cut back too aggressively in late summer, and my plants took three weeks to recover—a mistake that’s easy to avoid with patience.
Let’s dive into the five pro tips that’ll keep your green onions thriving between harvests.
- 1 Cut at the right height: Always trim 1-2 inches above the soil line, never closer. This preserves the growth point while allowing new leaves to emerge. I use a sharp knife to make clean cuts—dull blades crush stems and invite rot.
- 2 Water deeply after harvesting: Give your plants 1 cup of water per plant immediately after cutting. This replenishes moisture lost during the process and prevents transplant shock. I water in the morning to avoid fungal risks from evening dampness.
- 3 Fertilize lightly post-harvest: Use a balanced 5-10-10 fertilizer 3-5 days after cutting. Over-fertilizing can burn roots, but a light feed jumpstarts recovery. I mix 1 tbsp per 10 sq ft into the top inch of soil for best results.
- 4 Mulch to retain moisture: Spread 1 inch of straw or compost around the base to lock in humidity and regulate soil temperature. This is especially critical in USDA Zone 6a during heatwaves or cold snaps. I reuse mulch from my compost bin—zero waste!
- 5 Adjust sunlight in seasons: Green onions need 6+ hours of sun, but in summer, they may bolt prematurely. Provide afternoon shade with a row cover if temps exceed 85°F. In winter, supplement with a grow light for 4-6 hours daily if indoors.
One of the biggest mistakes I see is over-harvesting in early spring. Young plants are still building their bulbs, and aggressive cuts can weaken them for the entire season.
Instead, wait until leaves reach 6-12 inches tall before your first harvest. This gives the plant enough energy to regenerate quickly.
Seasonal adjustments are key too. In summer heat, increase watering to every 2-3 days and avoid fertilizing—plants focus on survival, not growth. In fall and winter, reduce watering to bi-weekly and protect plants from frost with row covers.
I’ve kept my green onions growing through three winters using these tweaks.
With these tips, you’ll enjoy continuous harvests for months, even from a single plant. The first time I saw new green onions poking through the soil just 10 days after cutting, I knew I’d cracked the code. Now it’s your turn—grab those shears and start snipping! 🌱