
How To
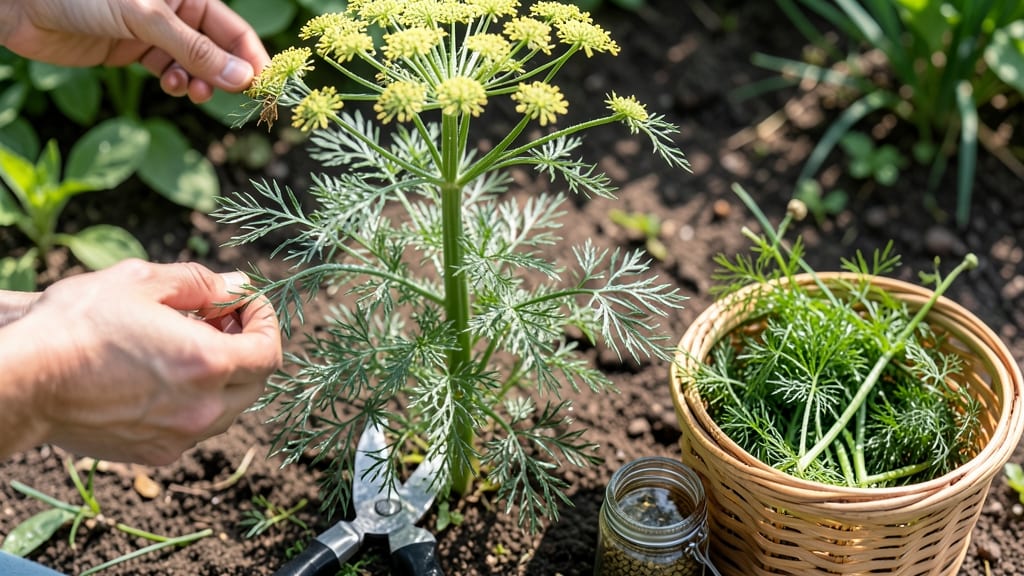
Growing and harvesting dill from seed to table is easier than you think, and the rewards are worth every bit of effort.
Fresh dill isn’t just a garnish—it’s the secret ingredient that elevates soups, salads, and pickles from good to unforgettable. But growing this delicate herb requires precision, and harvesting it at the right time can make all the difference between fragrant success and bitter disappointment.
You don’t need a green thumb or fancy equipment to grow 🌿 dill—just a sunny spot, well-draining soil, and a little patience. Whether you’re planting in containers or garden beds, I’ll walk you through every step, from seed to harvest, so you can enjoy homegrown dill all summer long.
Inside, you’ll discover the best planting window for your USDA Zone 6a climate, how to keep your dill thriving with the right watering and sunlight, and the exact moment to harvest for peak flavor. No more store-bought dill—just fresh, homegrown goodness straight from your garden.


Step-by-step guide to growing dill from seed indoors and outdoors
Growing dill from seed is one of the most rewarding ways to ensure a fresh, flavorful harvest for your favorite dishes. Unlike many herbs, dill thrives when grown directly from seed, making it perfect for both container gardens and garden beds.
The key to success lies in understanding its light needs, soil preferences, and watering schedule—all of which I’ll break down step by step below.
Dill is a cool-season herb that germinates best in temperatures between 60°F and 75°F. If you’re planting outdoors, wait until after the last frost date in your area (typically late April to early May in most regions).
For indoor starts, you can begin sowing seeds 4-6 weeks before your last frost date, though dill doesn’t transplant well, so direct sowing is ideal.
Before you begin, gather your supplies: dill seeds, a container or garden bed, well-draining soil, and a sunny spot. Dill prefers loamy, fertile soil with a pH between 6.0 and 7.0. If your soil is heavy or clay-like, amend it with compost or sand to improve drainage.
For containers, use a pot that’s at least 6 inches deep to accommodate the plant’s tall, taproot system.
Step-by-Step Guide to Planting Dill
-
Step 1: Prepare the Soil
Loosen the soil to a depth of 6 inches and mix in 2 inches of compost or well-rotted manure. For containers, use a potting mix designed for herbs or vegetables. -
Step 2: Sow the Seeds
Plant dill seeds ¼ inch deep and 12-18 inches apart in rows 18-24 inches apart. If growing in containers, sow 2-3 seeds per pot to ensure a fuller plant. -
Step 3: Provide Adequate Sunlight
Place your dill in a spot with full sun (6+ hours daily). For indoor growing, a south-facing window or a grow light works best. Lack of sunlight causes leggy, weak stems and poor flavor. -
Step 4: Water Consistently
Keep the soil evenly moist but not waterlogged. Water deeply in the morning to encourage strong root growth. Avoid wetting the leaves to prevent fungal diseases like powdery mildew. -
Step 5: Thin Seedlings (Outdoor Only)
Once seedlings are 2 inches tall, thin them to 12-18 inches apart to give each plant enough space to grow. This prevents competition for nutrients and reduces the risk of disease. -
Step 6: Fertilize Lightly
Apply a balanced fertilizer (5-10-10) 4-6 weeks after planting and again every 4-6 weeks during the growing season. Over-fertilizing can lead to excessive leaf growth at the expense of flavor. -
Step 7: Mulch for Retention
Add a 1-2 inch layer of mulch around the base of the plant to retain moisture and suppress weeds. Use organic mulch like straw or shredded leaves.
One of the most common mistakes when growing dill is overcrowding. Since dill has a deep taproot, it needs ample space to establish itself. If you’re growing in containers, choose larger pots to prevent root binding, which can stunt growth.
For garden beds, avoid planting dill too close to other herbs like parsley or cilantro, as they compete for nutrients.
Dill is also sensitive to transplanting stress, so if you’re starting seeds indoors, consider transplanting them outdoors only when they’ve developed their first true leaves. Use a small trowel to carefully lift seedlings and place them in the garden, ensuring the soil level matches the root ball.
Water thoroughly after transplanting to help the plant recover.
As your dill grows, you’ll notice it develops feathery, fern-like leaves and eventually produces yellow umbrella-shaped flowers. These flowers are a sign that the plant is maturing, and if you’re growing dill for seeds, you can leave some flowers to develop.
However, for the best leaf flavor, harvest before the plant bolts (sends up a flower stalk).
Once your dill reaches 12-18 inches tall and has vibrant green leaves, it’s ready for harvesting. Regular harvesting encourages bushier growth and prolongs the plant’s productivity. To harvest, simply snip the outer stems with a clean pair of scissors, leaving the lower leaves intact to keep the plant growing.
Avoid cutting more than ⅓ of the plant at once to prevent stress.
With the right care, your dill plants can produce harvests for 6-8 weeks during the growing season. If you’re in a warmer climate, you might even get a second harvest in the fall.
Just remember to keep an eye on pests like aphids and diseases like powdery mildew, which can affect dill if conditions aren’t ideal. Aphids can be washed off with water, while mildew can be prevented by ensuring good airflow around the plants.
When and how to harvest dill for maximum flavor and longevity
Timing your dill harvest is everything—cut too early, and you’ll miss out on its signature anise flavor, but wait too long, and the leaves turn bitter. The ideal time to harvest fresh dill is when the plant reaches 12-18 inches tall and has at least 6-8 healthy leaves.
This usually happens 60-75 days after sowing, depending on your climate. For the best flavor, focus on harvesting leafy stems rather than waiting for flowers to form, which signals the plant is shifting its energy toward seed production.
Harvesting dill leaves at the right stage ensures they retain their bright, citrusy aroma and delicate texture. If you’re growing dill for pickling or cooking, prioritize the outer leaves first—they’re larger and more flavorful.
Use a pair of clean, sharp pruning shears or scissors to snip stems just above a leaf node. This encourages bushier growth and prevents the plant from becoming leggy or woody.
🌿 Pro Tip: Harvesting Like a Pro
Timing: Morning harvests yield the freshest leaves, as moisture levels are highest. Avoid harvesting after rain to prevent fungal issues.
Technique: Cut stems at a 45-degree angle to maximize surface area for regrowth. Never pull leaves—this damages the plant.
Frequency: Harvest every 2-3 weeks to encourage continuous growth. Overharvesting weakens the plant, so leave at least half the foliage intact.
To store freshly harvested dill, wrap the stems loosely in a damp paper towel and place them in a resealable plastic bag. Store in the refrigerator’s crisper drawer for up to 2 weeks.
For longer storage, trim stems and place them in a glass of water like flowers, covering the top with a plastic bag. Change the water every 2-3 days to keep the leaves crisp.
If you’re drying dill for later use, bundle stems and hang them upside down in a dark, well-ventilated area for 1-2 weeks. Once completely dry, strip the leaves from the stems and store them in an airtight container away from light.
Dried dill retains its flavor for 6-12 months, though it loses some potency over time. For freezing, chop leaves and store them in ice cube trays with water or olive oil before transferring to a freezer bag.
Reviving wilted dill is easier than you think. If your dill looks droopy but still green, place the stems in a jar of cool water and let them soak for 30-60 minutes. Trim any brown or mushy parts before using.
For severely wilted dill, try a sugar water soak (1 tsp sugar per cup of water) for 1 hour to restore crispness. This trick works best for dill that’s been stored too long or transported in heat.
Don’t let your dill harvest go to waste—experiment with storage methods to keep this versatile herb on hand year-round. Whether you’re pickling cucumbers, making soups, or garnishing fish, knowing how to harvest and store dill ensures you’ll always have fresh flavor at your fingertips. 🌿