
Vegetables
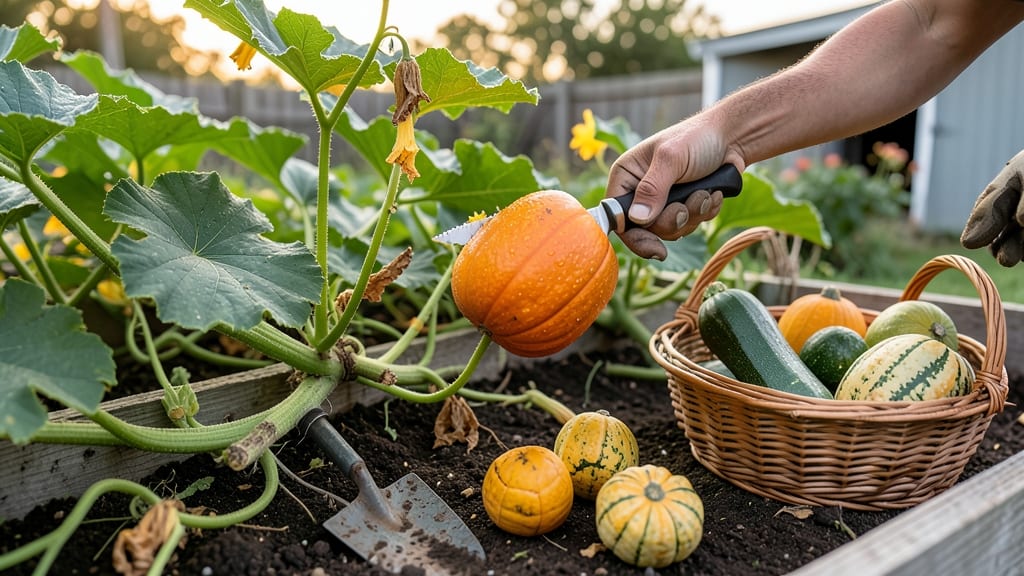
Harvesting squash at the right time turns your garden’s 🎃 bounty into delicious meals instead of bitter waste.
Picture this: you’ve nurtured your squash all season, and now the vines are heavy with fruit. But if you wait too long, that perfect zucchini turns rubbery, or your butternut squash develops a mealy texture.
The difference between a great harvest and a disappointing one often comes down to knowing exactly when to pick.
Summer squash like zucchini and pattypan are ready when they’re 6-8 inches long with firm skin that resists your thumbnail, while winter squash—think acorn or butternut—need a hard rind and a clean stem break. These simple tactile tests will help you avoid overripe squash and extend your harvest window.
In this guide, I’ll walk you through the three key signs to watch for, how to adjust for different varieties, and pro tips to keep your squash fresh longer. No more guesswork—just perfect, flavorful squash every time.
3 Tactile tests to determine perfect squash harvest time
There’s nothing worse than slicing into a squash only to find it’s bitter, seedy, or mushy—all signs you missed the perfect harvest window. The good news? You don’t need fancy tools to know when your squash is ready.
Instead, rely on these three tactile tests that let your hands (and eyes) guide you to peak ripeness. Whether you’re growing zucchini, butternut, or acorn squash, these methods work for both summer and winter varieties, ensuring you harvest at the perfect moment for flavor and texture.
Summer squash like zucchini and pattypan should be harvested young and tender, while winter squash like butternut and pumpkins need time to mature and develop hard rinds. The key is understanding when each type reaches its ideal stage. Skip the guesswork and use these simple, hands-on techniques to determine ripeness.
Trust me, your future meals (and your compost bin) will thank you!
- 1 Skin Hardness Test: Press your thumbnail into the squash’s skin. If it leaves a dent, it’s not ready. For summer squash, the skin should be firm but not rock-hard (think "slightly soft like a ripe tomato"). For winter squash, the skin should be tough enough to resist pressure—like a hardcover book.
- 2 Stem Separation: Gently twist the stem where it meets the squash. If it snaps cleanly (for summer squash) or pulls away with a slight resistance (for winter squash), it’s ready. A green stem end means it’s still growing; a dried, brown stem signals ripeness. Pro tip: Use a sharp knife to avoid damaging the vine.
- 3 Weight Assessment: Lift the squash in your hand. A ripe squash feels heavy for its size, indicating it’s filled with seeds and flesh. Unripe squash will feel light and hollow. For example, a 6-inch zucchini should weigh about 1 pound when ripe, while a 10-inch butternut should feel solid and dense.
Let’s break down these tests further. For summer squash, like zucchini or yellow crookneck, you’ll want to harvest when the fruit is 6-8 inches long and the skin is firm but tender. If you wait too long, the squash becomes tough and seedy.
On the other hand, winter squash, such as butternut or acorn, should be left on the vine until the skin hardens and the color deepens. This can take 80-100 days from planting, depending on the variety.
Visual cues matter too. Look for a deep, consistent color—no pale or blotchy spots—and a dried stem end. For winter squash, the skin should have a glossy or matte finish, depending on the variety, but it should never feel soft or spongy.
If you’re unsure, err on the side of harvesting earlier. Squash continues to ripen off the vine, but it won’t improve in quality once it’s overripe.
One common mistake gardeners make is waiting for squash to reach its maximum size before harvesting. While bigger might seem better, it often means bitter, fibrous flesh and wasted effort.
For instance, a zucchini left too long on the vine can grow into a hard, inedible monster—think "football-sized" instead of "dinner-plate" perfect. Similarly, winter squash like pumpkins should be harvested before the first frost, even if they haven’t reached their peak decorative size.
Here’s a pro tip: Harvest regularly to encourage more production. For summer squash, check your plants every 2-3 days during peak season. For winter squash, a single harvest can last through the fall and winter if stored properly.
Keep an eye on the vine’s energy—if it’s putting all its resources into one giant squash, it’s time to pick!
If you’re growing multiple varieties, keep a harvest journal to track ripening times. Note the days to maturity for each type, as well as the weather conditions. For example, cool temperatures can slow ripening, while hot, dry weather might speed it up.
Adjust your tactile tests accordingly—sometimes a squash feels firmer in heat but is still edible, while others may ripen faster than expected.
Finally, don’t forget to handle squash with care during harvest. Use a sharp knife or pruners to cut the stem, leaving a 1-inch stem attached to the squash. This helps prevent rot and extends shelf life.
After harvesting, let summer squash cure in a shady, dry place for a day or two to toughen the skin slightly, while winter squash can be stored in a cool, dark place for months.
With these tactile tests, you’ll never second-guess your squash harvest time again. Your garden will thank you with abundant, flavorful produce, and your kitchen will be ready for everything from zucchini fritters to butternut squash soup—all at their peak! 🎃
How to extend squash harvest time and prevent spoilage
Even after mastering the perfect squash harvest time, many gardeners struggle with overripe squash that spoils quickly. The key to extending your harvest lies in proper vine management and smart storage techniques. By implementing these strategies, you can enjoy fresh squash for weeks beyond the typical harvest window.
First, focus on selective harvesting—picking squash at the right moment prevents overcrowding on the vine. When you leave too many fruits, they compete for nutrients, leading to uneven ripening and faster spoilage. Aim to harvest every 2-3 days during peak production to keep the plant productive and healthy.
⚠️ callout-warning ⚠️
⚠️ Overripe Squash Warning Signs
Missed harvest time leads to these spoilage indicators:
- Soft spots or wrinkled skin (signs of rot)
- Dull, faded color (loss of vibrancy)
- Squash separates easily from vine (overgrowth)
For winter squash varieties like butternut or acorn, curing is essential to extend shelf life. After harvesting, place squash in a warm, dry spot (80-85°F) for 10 days to harden the skin. This process enhances flavor and storage potential, allowing squash to last 2-3 months in a cool, dark place.
Store summer squash differently—wrap them in paper towels and refrigerate for up to 2 weeks. Avoid plastic bags, which trap moisture and accelerate spoilage. For long-term storage, consider freezing summer squash after blanching to preserve texture and nutrients.
Pruning excess vines and removing dead leaves improves airflow, reducing the risk of powdery mildew and bacterial rot. Focus on maintaining healthy vine growth by trimming back overgrown sections while leaving enough foliage to support photosynthesis.
Finally, rotate your planting schedule to stagger harvests. By sowing successive squash seeds every 2 weeks, you create a continuous harvest window from summer through early fall. This simple tactic ensures you’re always picking fresh squash instead of dealing with a glut of overripe produce.